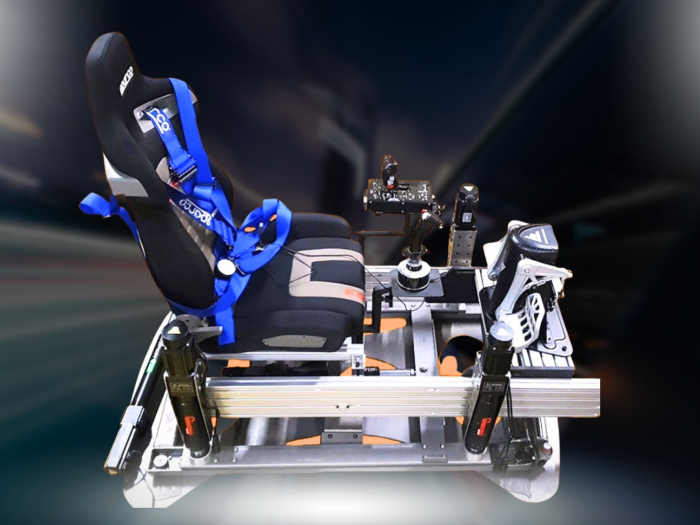

Every piece of hardware that feels rock-solid on a static rig becomes an immediate liability the second your chassis pitches into a high-G kerb strike. Bolting standard sim kit onto an active platform inevitably causes violent rattles, flexing brackets, and severed wiring looms under aggressive multi-axis heave and roll. Choosing the right motion simulator cockpit accessories requires an engineering-first mindset, where eliminating mechanical play and shedding unnecessary unsprung mass are paramount to preserving actuator agility.
You invested in dynamic motion to experience every subtle nuance of track telemetry, not to fight vibrating peripherals or sluggish platform behaviour caused by dead weight. You will discover which motion simulator cockpit accessories deliver genuine immersion, uncompromising structural rigidity, and faster lap times on dynamic rigs. We break down zero-flex mounting solutions, fail-safe dynamic cable routing methods, and precision peripherals built to endure violent pitch, roll, and traction loss.
Key Takeaways
- Understand why dynamic rigs demand purpose-built motion simulator cockpit accessories designed to minimise unsprung weight and protect actuator responsiveness.
- Discover the reinforcement methods and zero-flex brackets necessary to anchor high-torque direct drive wheelbases securely under violent multi-axis forces.
- Learn how to layer tactile haptic feedback alongside motion-compensated VR headsets to achieve seamless, authentic sensory immersion.
- Master proven dynamic cable routing techniques with calculated articulation loops to eliminate snagging and electrical failures during extreme chassis travel.
- Gain a strategic roadmap for selecting modular, open-architecture mounting hardware that scales seamlessly as your simulator setup evolves.
Why Motion Simulator Cockpit Accessories Demand Dedicated Engineering
A static sim rig serves purely as a passive frame, holding your controls against gravity and driver muscle. The moment you transition to an active motion simulator, that chassis transforms into an accelerating, dynamic test bench. Premium motion simulator cockpit accessories are not decorative add-ons; they are load-bearing mechanical components engineered to survive rapid multi-axis pitch, roll, yaw, and heave forces. When standard static brackets flex under violent motion, they act like unwanted dampers. This structural deflection absorbs subtle chassis telemetry, muddying the direct drive motor's feedback before it ever reaches your hands.
Dynamic Inertia versus Static Weight Loads
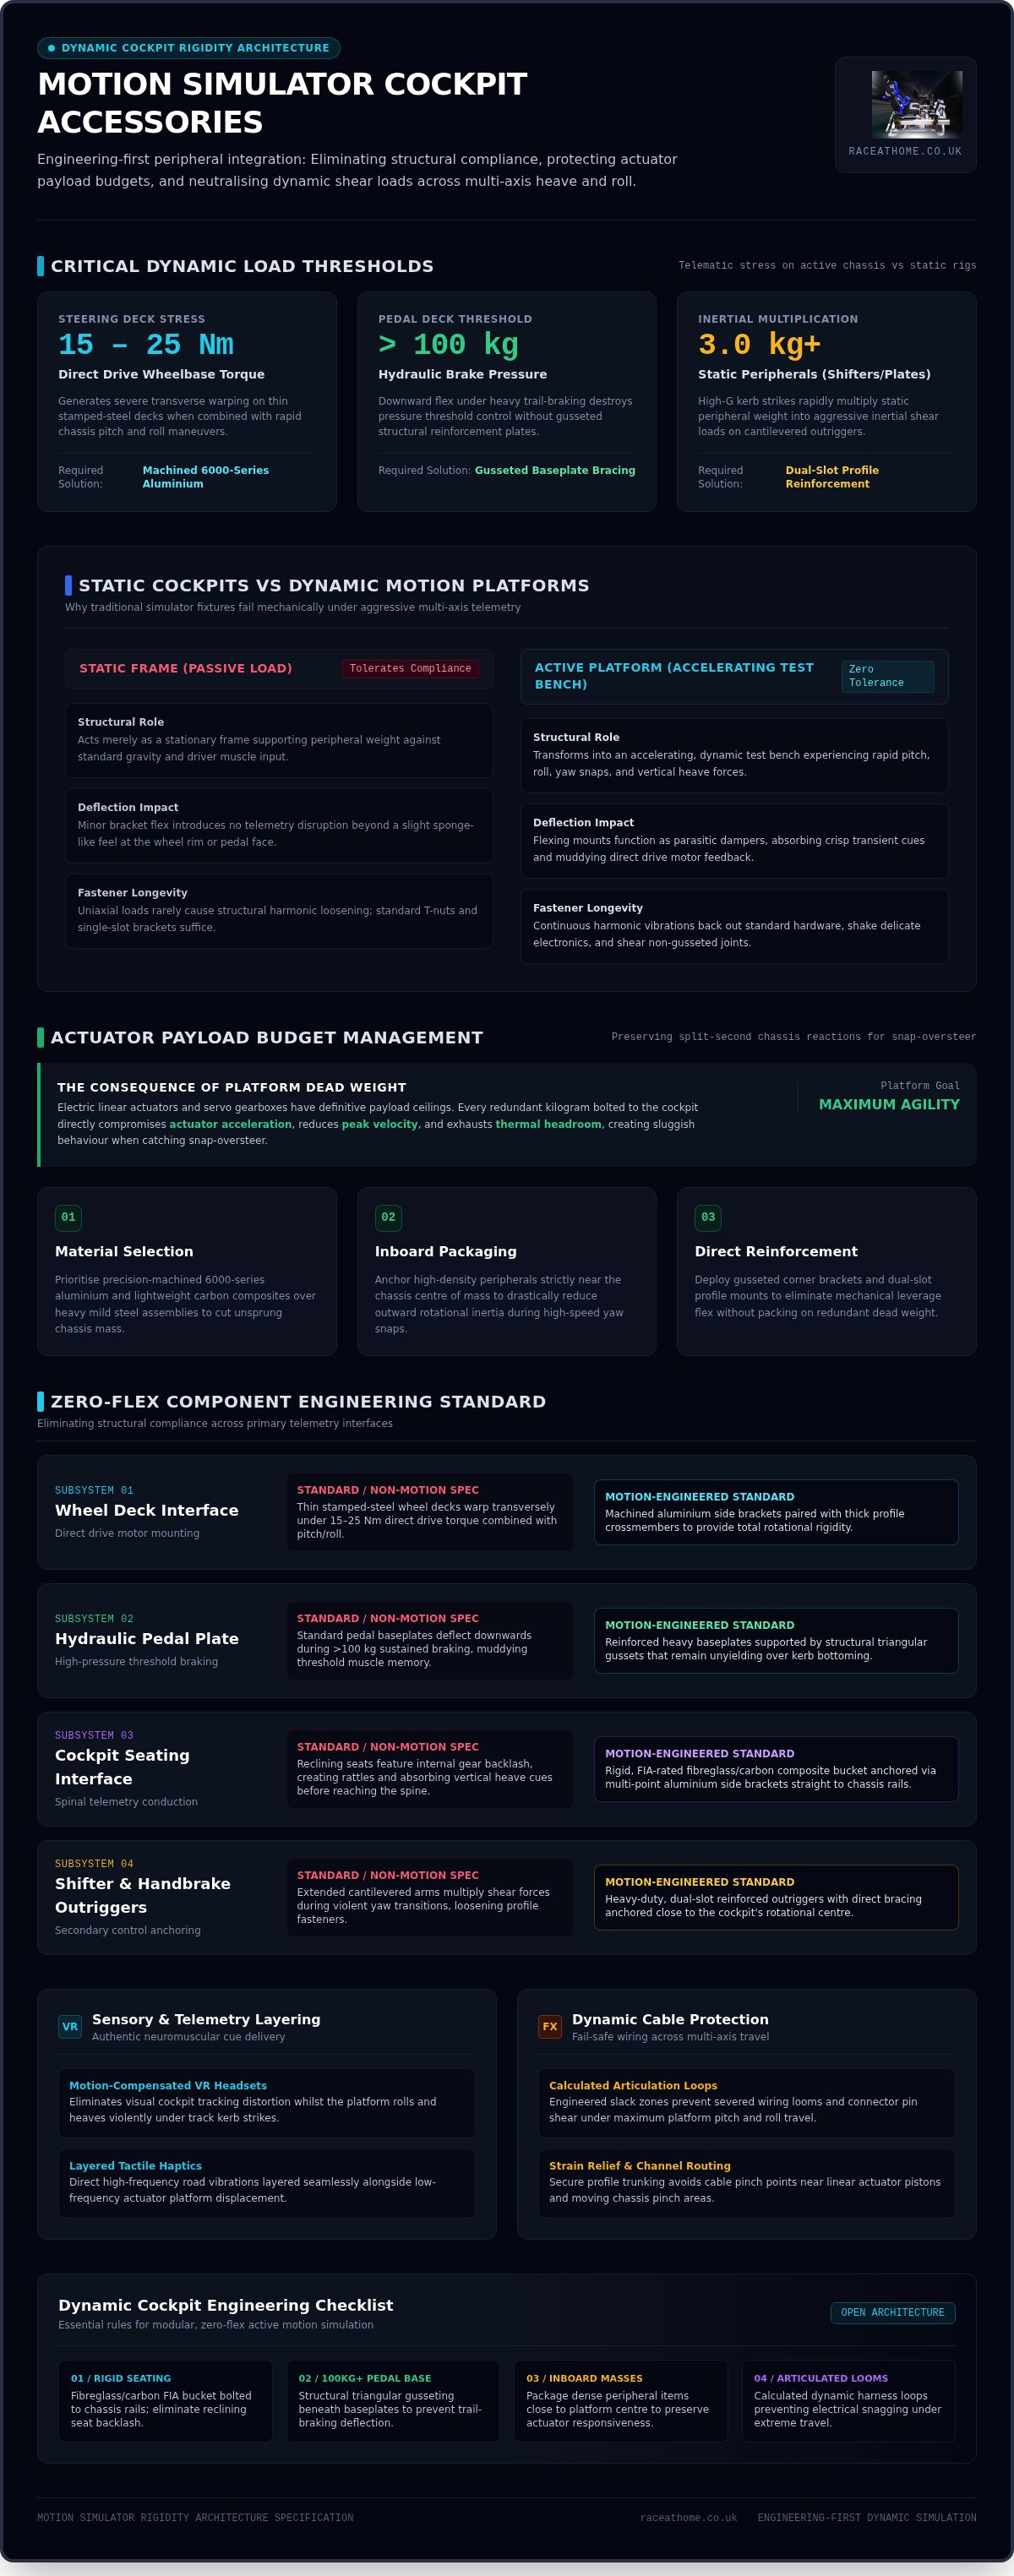
A three-kilogram shifter assembly feels rock-solid on a showroom floor. Hit a high-speed kerb, however, and sudden vertical heave instantly multiplies that static weight into punishing inertial shear loads. Cantilevered hardware, such as extended keyboard arms and outward-hanging handbrake plates, acts as a torque multiplier against profile channels during aggressive yaw snaps. If your mounts allow microscopic deflection, continuous harmonic vibration will loosen fasteners, shake sensitive electronics, and swallow the crisp transient cues your actuators produce.
The Critical Role of Actuator Payload Budgets
Electric linear actuators and servo-driven gearboxes operate within definitive payload limits. Every kilogram bolted to your chassis directly compromises actuator acceleration, peak velocity, and thermal headroom. Overburdening a dynamic platform creates laggy, sluggish behaviour, dulling the split-second chassis reactions needed to catch sudden snap-oversteer.
Preserving lightning-fast platform transitions requires disciplined mass management across your entire rig:
- Material Selection: Choose precision-machined 6000-series aluminium or lightweight carbon composites over heavy mild steel.
- Inboard Packaging: Anchor dense peripherals as close to the rig's centre of mass as practical to reduce rotational inertia.
- Direct Reinforcement: Use gusseted corner brackets and dual-slot profile mounts to eliminate leverage flex without adding bulk.
Investing in purpose-built motion simulator cockpit accessories ensures your motion system delivers pure, uncompromised telemetry directly to your senses rather than fighting unnecessary dead weight.
Essential Motion Simulator Cockpit Accessories for Maximum Rigidity
Static cockpits tolerate minor compliance without immediate ruin. Dynamic cockpits do not. As established aerospace research into human factors in simulation demonstrates, genuine neuromuscular training requires authentic, uncorrupted motion cues. Choosing the correct motion simulator cockpit accessories means selecting load-bearing components that eliminate compliance entirely, guaranteeing that every burst of actuator energy translates directly to your inner ear rather than flexing steel plates.
Zero-Flex Direct Drive Wheel and Pedal Mounts
Thin stamped-steel wheel decks warp under the rapid directional changes of direct drive motors generating 15 to 25 Nm of torque. When an active rig adds pitch and roll to those steering torques, standard wheel decks bend along the transverse axis. Machined aluminium side brackets paired with thick profile crossmembers eliminate this rotational deflection. Similarly, modern hydraulic pedals often see sustained brake pressures exceeding 100 kg. If your pedal deck flexes downwards under heavy trail-braking, threshold control vanishes. Reinforced baseplates braced by structural gussets keep the pedal face rock-solid, even when bottoming out over aggressive kerbs.
FIA-Rated Bucket Seats and Solid Mounting Brackets
Reclining road-car seats have no place on a motion chassis. The internal mechanical teeth within reclining backrests introduce tiny amounts of backlash. Under heave transitions, that tiny gap creates distracting rattles and dampens vertical acceleration cues before they reach your spine. A rigid, FIA-rated fibreglass or carbon composite bucket seat functions as an uncompromising telemetry bridge. Anchor your seat using multi-point aluminium side brackets bolted straight to the chassis rails, entirely avoiding lightweight consumer sliders that rattle loose over time.
Heavy-Duty Shifter and Handbrake Outriggers
Secondary controls face severe leverage during competition. Snapping a sequential lever or yanking a hydraulic handbrake in rally stages exerts significant outward torque against your cockpit side rails. Without structural triangulation, cantilevered arms will bow, flexing outward under aggressive input. Installing triangulated corner gussets prevents lateral displacement, keeping shifting gates precise whilst ensuring the outrigger never obstructs quick cockpit entry or exit.
Equipping your platform with engineered sim racing accessories transforms an unstable rig into an authentic race car cockpit. If you want to ensure your dynamic hardware operates at its absolute peak, explore the purpose-built accessories curated by Race@Home to keep your platform completely rigid under competition conditions.
Sensory and Telemetry Accessories: Haptics, VR, and Motion Cancellation
Gross platform displacement mimics weight transfer and sustained G-forces, but true driving realism requires micro-detail. Sensory motion simulator cockpit accessories bridge the gap between gross physical movement and road surface texture. By layering high-frequency mechanical vibration over multi-axis movement, your simulator provides the full sensory bandwidth of a real racing vehicle, from subtle ABS chatter through the soles of your racing boots to the instantaneous kick of a snapped downshift.
Tactile Bass Shakers and Harmonic Telemetry
Tactile transducers deliver high-frequency harmonic signals that electric actuators simply cannot reproduce. Mounting dedicated transducers directly to the underside of the pedal deck and the rear of the bucket seat creates clear spatial separation. You feel front tyre scrub and lockups through your feet, whilst rear traction loss and kerb strikes resonate directly through your pelvis. Use rubber isolators between the mounting plates and primary frame rails. This mechanical decoupling stops audio vibrations travelling into sensitive peripheral electronics, keeping your telemetry cues distinct rather than muddy.
Virtual Reality Integration and Headset Tracking
Pairing high-resolution virtual reality headsets with dynamic platforms creates unmatched visual immersion. Much like research by major aerospace teams upgrading advanced simulator visual and digital systems, aligning physical motion with visual field tracking prevents vestibular sensory conflict. When your chassis rolls aggressively into a banked bend, inside-out tracking cameras interpret the rig's movement as your own head moving, displacing your point of view inside the virtual cockpit. Hardware motion compensation solves this completely. Rigidly mounting an external tracker directly to the cockpit profile feeds reference coordinates back to your software, subtracting chassis movement from your headset display. Discover how this architecture comes together in our detailed guide on building a professional motion rig.
Active Airflow Systems and Cockpit Cooling
Wind simulators do far more than blow cold air into your face. Twin ducted blowers driven by in-game telemetry translate vehicle speed directly into dynamic airflow, heightening your perception of straight-line acceleration and braking. During endurance stints, this focused air delivery keeps you cool under heavy VR headsets whilst actively keeping moisture off optical lenses. Mount high-output blowers with reinforced aluminium brackets; standard 3D-printed plastic collars quickly crack under the constant shock loads of violent chassis heave.
Installing and Organising Accessories on an Active Motion Chassis
Rigid brackets mean nothing if your wiring shears under full actuator extension. Standard static cable clips and plastic zip ties quickly fail when subjected to continuous multi-axis articulation. Fitting motion simulator cockpit accessories requires an aerospace mindset where mechanical fastening, electrical isolation, and kinetic clearance receive equal engineering priority. Implementing a methodical installation framework protects expensive hardware from mechanical pinch points and prevents electrical dropouts during competition.
A reliable motion cockpit installation follows four distinct stages:
- Kinematic Sweep: Manually cycle all actuators through maximum pitch, roll, and heave travel to establish mechanical clearance envelopes before bolting down peripherals.
- Sub-Harness Segregation: Bundle low-voltage USB and sensor lines entirely away from high-current direct drive and actuator AC lines to eliminate electromagnetic interference.
- Articulated Loom Anchor: Fix dynamic cables at designated pivot nodes using flexible drag chains or heavy-duty braided sleeving.
- Torque Verification: Fasten every bolt to spec with vibration-proof hardware, marking bolt heads with torque paint to spot mechanical loosening at a glance.
Dynamic Cable Articulation and Strain Relief
Every cable bridging the moving upper cockpit to the static floor must feature a calculated service loop. If an umbilical harness pulls taut during extreme yaw or traction-loss travel, the connector will rip from its socket or sever internally. Route data cables through industrial nylon drag chains anchored at the primary pitch axis. Never run unshielded USB leads alongside high-voltage servo cables. Electromagnetic interference emitted by high-load direct drive steering bases and motion motor drives can easily corrupt USB packet streams, causing sudden disconnects mid-corner.
Fastener Security and Vibration Resistance
Continuous harmonic vibration from tactile transducers and actuator reversals will back out unsealed metric fasteners. Standard flat washers simply cannot maintain clamp loads against aluminium profile channels under dynamic stress. Use roll-in spring T-nuts paired with serrated flanged bolts that bite directly into the aluminium extrusion slots. Applying a drop of medium-strength blue thread locker to every bolt ensures hardware stays put without requiring heat guns for future cockpit adjustments.
Finally, position an accessible emergency stop switch directly within your natural arm sweep, ensuring you can cut actuator power instantly if an unexpected excursion occurs. For drivers seeking an uncompromising, track-ready foundation, you can explore engineered motion solutions with Race@Home to build a dependable, competition-grade rig that stays rock-solid under dynamic loads.
Selecting the Right Ecosystem for Your Motion Simulator Setup
A strategic buying plan prevents costly hardware redundancies. Rather than purchasing bolt-on items impulsively, assess your dynamic cockpit through the lens of mechanical synergy. High-calibre motion simulator cockpit accessories should expand your platform's sensory fidelity without compromising structural rigidity or introducing parasitic mass. If you are currently evaluating dynamic chassis investments, consult our comprehensive motion rig buyer's guide to benchmark platform capabilities before finalising peripheral mounting hardware.
Modular Open Architecture versus Closed Ecosystems
Proprietary cockpits lock you into restricted mounting patterns. When a manufacturer updates their pedal geometry or direct drive bolt circles, closed ecosystems force you to buy expensive proprietary adapters or replace substantial frame sections. In contrast, modular industrial aluminium profiles provide an open-architecture foundation that accommodates elite third-party peripherals effortlessly.
A bespoke chassis foundation offers distinct mechanical advantages for peripheral management:
- Ultra-Low Centre of Gravity: The proprietary LowSlider ultra-low profile chassis design keeps driver mass close to the floor, significantly reducing the dynamic lever arms exerted against external peripheral mounts.
- Industrial Tolerances: Hand-built in the UK to rigorous engineering standards, precision-machined joints eliminate the mechanical slop that ruins fine actuator feedback.
- Bespoke Hardware Accommodation: Open profile geometry allows you to position tactile transducers, sequential shifters, and telemetry dashes exactly where ergonomic reach and mass centralisation dictate.
Next Steps: Complete Your High-End Motion Cockpit
Dynamic sim racing rewards uncompromising engineering standards. Zero structural deflection, disciplined payload management, vibration-proof fasteners, and shielded umbilical wiring separate world-class rigs from troublesome setups. High-performance sim racing accessories and motion bases must operate as a unified mechanical system, ensuring every micro-detail from tyre slip to kerb strikes reaches your senses instantaneously.
When you are ready to move beyond static compromises, partner with engineering specialists who understand the rigorous demands of active simulation. We invite drivers seeking peak realism to explore British-built LowSlider motion platforms and experience how industrial-grade motion platforms and high-fidelity VR integration redefine track precision.
Engineer Your Dynamic Rig for Zero-Compromise Performance
Transitioning to active simulation transforms your cockpit from a stationary seat into a high-acceleration testing environment. Equipping your setup with purpose-built motion simulator cockpit accessories ensures telemetry cues remain razor-sharp, eliminating the structural flex, cable strain, and unwanted dead weight that dull actuator response. When your peripherals, tactile haptics, and visual tracking operate in perfect harmony, every apex and kerb strike translates directly into genuine muscle memory.
Building a world-class simulator shouldn't mean wrestling with flimsy universal brackets or enduring violent mechanical clatter. You deserve a setup engineered to eliminate structural flex across all axes, hand-crafted in the UK using industrial-grade materials to withstand extreme dynamic forces. Featuring a proprietary ultra-low profile design delivered in four quick-assembly modules assembled in under an hour, achieving competition-grade rigidity has never been more accessible.
Take your driving to the absolute limit. Explore British-built LowSlider motion platforms and custom simulator components to experience the ultimate fusion of low-profile engineering, unyielding stiffness, and pure track immersion.
Frequently Asked Questions
Can standard sim racing cockpit accessories be used on a motion platform?
Yes, but standard accessories often lack the structural reinforcement required for dynamic forces. Off-the-shelf brackets designed for static cockpits flex, rattle, or twist under violent multi-axis pitch and heave. To preserve telemetry clarity and prevent fatigue failure, purpose-engineered motion simulator cockpit accessories made from thick-gauge aluminium profile or triangulated plate are strongly recommended. Static clamps will inevitably vibrate loose under heavy cornering loads.
How do I prevent accessories and brackets from rattling loose on a motion rig?
Use medium-strength thread locker and serrated hardware on every fastener across the chassis. Continuous harmonic vibration from tactile feedback and actuator reversals easily backs out standard bolts. Always pair roll-in spring T-nuts with serrated flanged screws that physically bite into the aluminium profile channels. Applying a drop of blue anaerobic thread locker prevents thread creep while allowing intentional adjustments. Torque-mark every bolt head to quickly spot any loosening during routine maintenance inspections.
Will heavy cockpit accessories slow down my motion simulator actuators?
Yes, accumulating dead weight directly degrades actuator acceleration, speed, and thermal efficiency. Actuators possess strict dynamic payload envelopes. Bolting excessively heavy steel accessories or bulky monitors onto the moving chassis forces the drive motors to work harder, blunting sharp directional changes and dulling subtle telemetry transients. Keep peripheral mass centralised around your rig's centre of gravity and select lightweight, high-tensile aluminium brackets to preserve peak platform agility during aggressive racing manoeuvres.
What is motion cancellation and why do VR accessories require it?
Motion cancellation is software filtering that synchronises your virtual point of view with your moving rig. VR headsets rely on internal inertial sensors and external tracking cameras to calculate position. When your motion platform pitches or rolls, the headset interprets cockpit movement as head movement, sending your virtual driver viewpoint through the virtual windscreen. Dedicated motion cancellation trackers bolt to your chassis, constantly feeding platform telemetry back to your headset software to subtract chassis displacement in real time.
How do I protect peripheral USB cables from snapping during aggressive platform motion?
Route dynamic wiring through industrial drag chains and build calculated articulation service loops at every mechanical pivot. Cables bridging the moving cockpit and stationary PC experience violent, repeated bending fatigue. Calculate service loops based on maximum actuator extension, encasing bundles in flexible braided sleeving or articulated nylon drag chains. Always anchor cable ends firmly on both sides of any dynamic hinge with mechanical strain-relief clamps. This stops tensile shock from reaching sensitive peripheral sockets during full chassis travel.
Is an FIA-approved racing seat really necessary for an active motion simulator?
An FIA homologation label isn't strictly necessary, but a rigid competition-grade bucket seat is essential. Adjustable reclining road seats contain internal mechanical teeth that exhibit subtle play under load. On a dynamic chassis, that backlash translates into audible clatter and deadens vertical heave cues before they reach your spine. A solid fibreglass or carbon composite bucket seat eliminates structural flex, acting as an uncompromising telemetry conductor that delivers instantaneous chassis feedback straight to the driver.
Where should I position an emergency stop button on a moving cockpit?
Position your emergency stop switch within your natural primary arm sweep, securely anchored to the main profile upright. In an unexpected mechanical excursion or software glitch, you must be able to kill actuator power instantly without fumbling. Mount the switch on your dominant hand's side, forward of the shifter and clear of the steering arc. Ensure the bracket is completely rigid so striking the button forcefully never bends the mount or dislodges surrounding motion simulator cockpit accessories.


