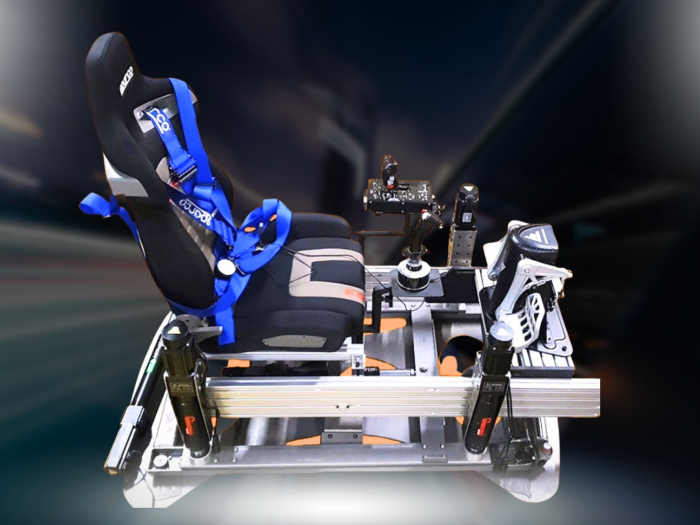

What if the most convincing motion cue in rFactor 2 starts with a line of telemetry, not a bigger platform? A motion rig for rFactor 2 depends on the whole signal path: the simulation outputs data, compatible motion software interprets it, and the platform turns selected cues into physical movement. If any part is misconfigured, extra degrees of freedom alone won’t make the drive feel more authentic.
If you’re comparing software, plugins and hardware, look beyond a platform’s headline specifications. Compatibility depends on the telemetry method and software version, while careful tuning helps keep movement controlled rather than distracting. Adding motion doesn’t necessarily mean replacing your existing rig, but you do need to check how the platform will fit and connect to it.
This guide explains how rFactor 2 telemetry reaches a motion platform, what to verify before choosing hardware, and how to configure the system for clear, convincing feedback. You’ll also see how degrees of freedom shape the experience, including where a compact LowSlider platform may fit, without confusing hardware capability with software compatibility.
Key Takeaways
- A motion rig for rFactor 2 relies on the game’s telemetry being interpreted by compatible motion software before it reaches the platform.
- Check the full software, controller and platform combination, rather than assuming compatibility from the game name alone.
- Compare 3DoF and 6 DOF by the movement cues you want, then weigh them against your space, cockpit layout and existing hardware.
- Start with restrained motion settings, calibrate carefully and adjust one cue at a time to build convincing feedback without overdoing it.
- Explore how a compact, ultra-low-profile LowSlider platform could suit your rig and preferred style of motion.
What does a motion rig for rFactor 2 actually do?
rFactor 2 provides telemetry. Compatible motion software interprets that data and turns selected signals into platform movement. The game doesn’t directly command every actuator. Instead, the software maps information about the car and its behaviour to movement your rig can reproduce.
A motion rig for rFactor 2 is a hardware platform that, when paired with a compatible software connection, converts selected game telemetry into physical movement cues for the driver. Those cues can make a simulated event feel more immediate, but they aren’t the same as experiencing sustained forces in a real car. The rig moves or tilts your seat and cockpit to suggest what the vehicle is doing, rather than recreating the full force pressing you into a seat during acceleration or cornering.
Motion simulators can move across different axes, often described using degrees of freedom. For a general introduction to what a motion simulator is, including this movement vocabulary, see the linked overview.
What information does rFactor 2 send to a motion rig?
Telemetry is game-generated data describing vehicle behaviour and events on track. Depending on the software connection, signals such as braking, lateral load through a corner or wheel slip may be available to inform motion effects. A brake cue, for instance, could prompt the platform to pitch forwards; a lateral-load cue could create a roll sensation as you turn.
The signals available and the way they’re delivered depend on the software connection and its implementation. The simulation generates the data, but compatible software determines how selected data becomes movement. That’s why checking support for the game and the relevant connection method matters before choosing a platform.
What can you feel during a race?
With suitable cues configured, braking can produce a forward pitch, cornering can create a sense of roll, and a kerb strike or change in surface can add a quick jolt. Together, these responses can make the car’s behaviour feel more present and help you connect what you see with what you feel.
Motion is a designed interpretation, not a literal reproduction of every force acting on a race car. The software selects and scales cues, while the platform provides a physical suggestion of the event. If the effects are too strong or poorly balanced, they can distract rather than immerse. For more on how force-related cues contribute to the experience, read our sim racing G-force feedback guide.
How rFactor 2 telemetry becomes motion on your rig
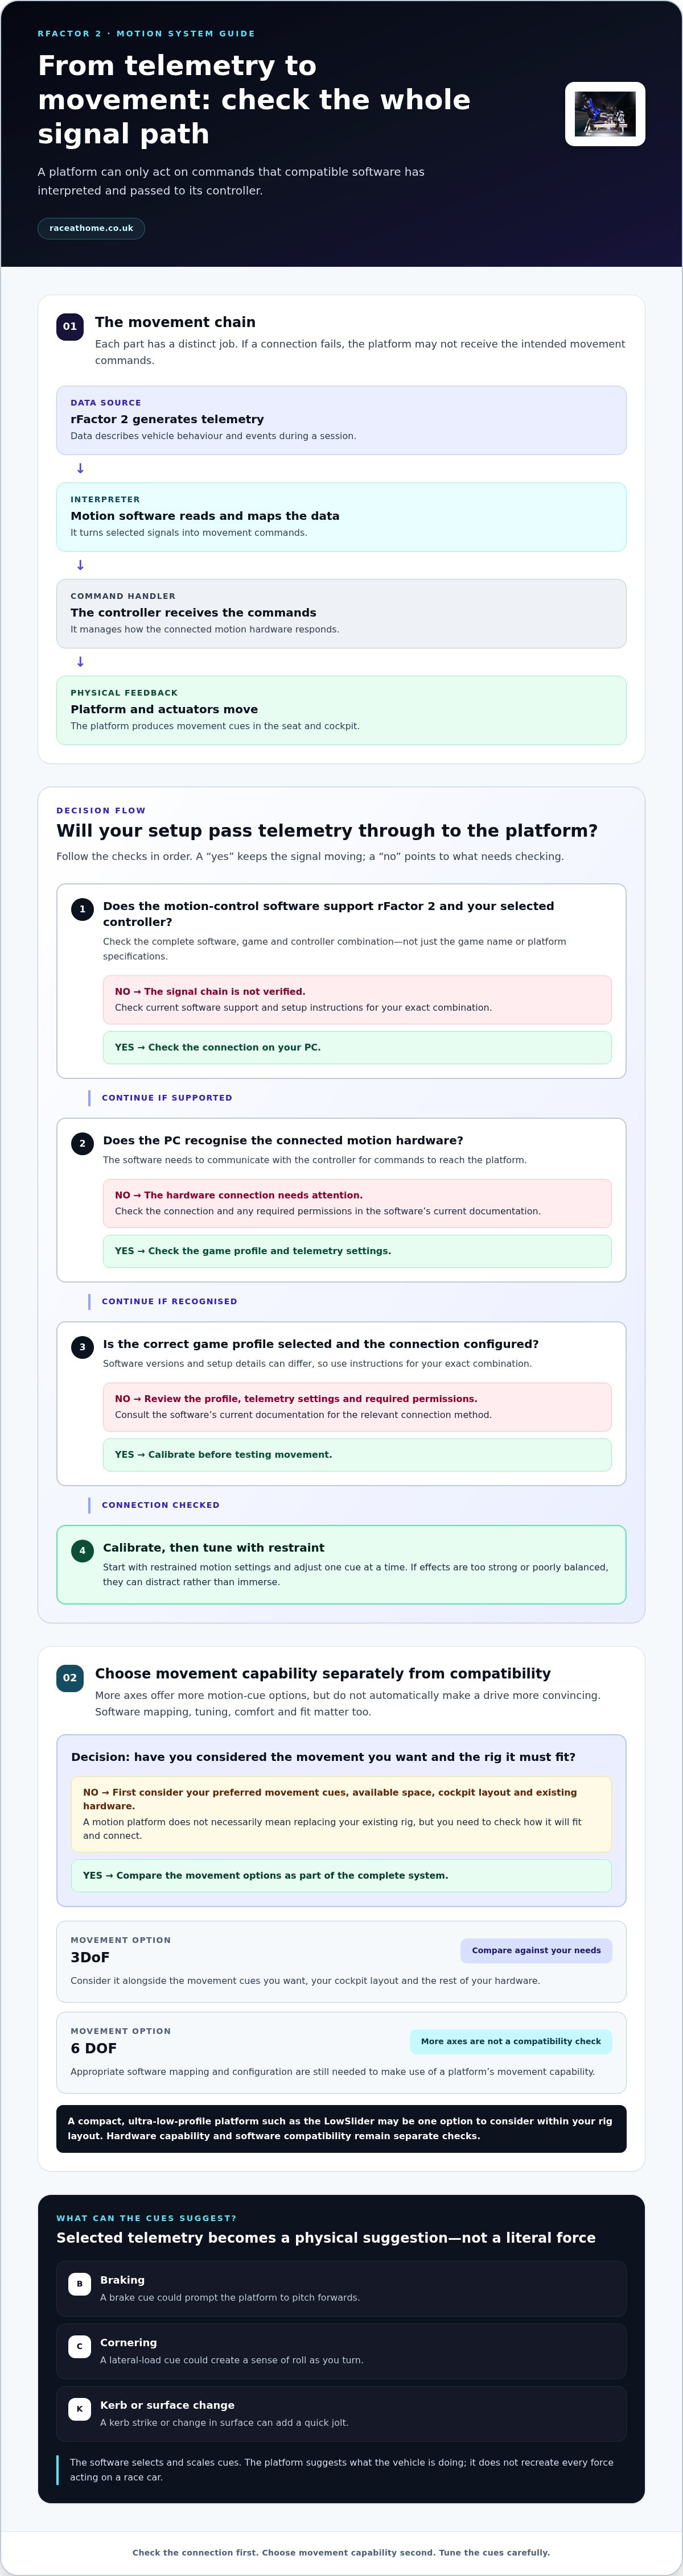
The connection is a chain, not a direct command from game to actuator. Each component has a distinct role. A motion rig for rFactor 2 responds only if the game’s data passes through compatible software and controller hardware in the expected way.
- rFactor 2 generates telemetry. The game produces data about vehicle behaviour and events during a session.
- Motion-control software reads and maps that data. It interprets available telemetry, then converts selected signals into movement commands.
- The controller receives those commands. It manages how the connected motion hardware responds.
- The platform and actuators move. They execute the commands, producing the physical cues you feel in the seat and cockpit.
This is why a platform’s movement capability and software compatibility are separate considerations. The platform carries out mapped commands; it doesn’t interpret rFactor 2 telemetry by itself. A motion system still needs a software connection that supports the game and communicates correctly with its controller, regardless of how many axes the platform can move across.
Which parts of the motion system need to work together?
Think of the game as the data source, motion software as the interpreter, the controller as the command handler, and the actuators as the hardware that produces movement. If the software can read the game but cannot communicate with the controller, the chain breaks. If the platform has more movement axes, appropriate software mapping and configuration are still needed to make use of them.
Game telemetry support, software configuration and motion hardware are related but distinct. Understanding the difference helps you assess the complete system rather than choosing on degrees of freedom alone. For a broader look at platform movement, see our 6 DOF motion simulator guide.
What should you check before connecting rFactor 2?
Support and setup details can change with software versions, so use instructions that match your exact combination. Check that the motion-control software supports rFactor 2 and your selected controller. Then confirm that the PC recognises the connected hardware and that the software has the correct game profile selected. Review any required connection permissions and telemetry settings in the software’s current documentation.
Once the connection is established, follow the relevant calibration process before testing movement. When comparing hardware, Race@Home’s LowSlider motion platforms offer 3DoF and 6 DOF options to consider as part of a complete motion-feedback system.
How to choose an rFactor 2 motion rig that fits your setup
The right choice depends on the movement you want to feel, the space available and how well the platform integrates with your cockpit. More axes can offer more options for motion cues, but they don’t automatically create a more convincing drive. Compatibility, tuning and comfort matter just as much.
Is 3DoF or 6 DOF better for rFactor 2?
Degrees of freedom describe the directions in which a platform can move. A 3DoF system moves across three axes; a 6 DOF system can move across six, combining linear movement with rotation. The particular movements available and how they’re used depend on the platform design and software mapping.
More axes can give the software greater flexibility to represent different cues, but they don’t guarantee greater realism. A well-tuned 3DoF setup may feel more natural to you than a 6 DOF system with effects that are too strong or poorly matched to your preferences.
| Platform type | Movement scope | Setup considerations | May suit priorities such as |
|---|---|---|---|
| 3DoF | Movement across three axes, as defined by the platform | Check available clearance, cockpit fit and how the software maps cues | A focused set of motion effects and a simpler movement brief |
| 6 DOF | Movement across six axes, combining translation and rotation | Plan for the complete moving cockpit, including clearances and connections | A wider range of potential movement cues and greater flexibility |
Use this as a starting point, not a universal ranking. The 6 DOF versus 3DoF distinction is useful only if the motion software can interpret the data and map cues in a way you find comfortable.
How do cockpit space and existing equipment affect the choice?
Measure the intended position and movement envelope before choosing. Allow for the platform’s footprint, clearance around moving parts, seat position and access to the rig. Check that your wheel, pedals and cockpit remain secure as a complete system, and account for the cables and PC connections needed for your setup.
Then consider your driving priorities. If you want selected cues with restrained movement, a 3DoF platform may meet your brief; if you value a broader movement range, a 6 DOF design may be worth considering. Race@Home’s LowSlider platforms have a compact, ultra-low-profile design, with both 3DoF and 6 DOF options. For more on planning the wider cockpit, see our professional motion rig setup guide.
How to configure and tune rFactor 2 motion feedback
A controlled first setup makes it easier to tell whether each movement cue is helping. Follow the platform setup guidance alongside the current documentation for your motion software. Menu names, supported connections and calibration steps can vary by system and software version.
Calibrate safely, test progressively and prioritise clear driving feedback. This approach helps you build a motion profile that adds useful sensation without competing with your steering, braking or concentration.
What is a sensible first-run setup sequence?
For a motion rig for rFactor 2, work through the connection methodically rather than turning every effect on at once:
- Install supported software: Use the motion-control software and version that support your game and controller, following their current setup instructions.
- Select the game profile: Choose the rFactor 2 profile where available, then connect the software to the platform controller as directed.
- Calibrate and check safely: Confirm movement direction and configured limits, and check how the emergency stop behaves before starting a driving session. Keep clear of moving parts and follow the platform’s safety guidance.
- Test in stages: Begin in a controlled, low-intensity session. Enable or adjust one cue at a time so you can identify what each change does.
If movement goes in the wrong direction, feels unexpected or doesn’t respond as the software indicates, stop the test and review the connection and calibration instructions before continuing.
How can you make motion feel convincing rather than distracting?
Start with restrained cue levels. Add braking, cornering and road or kerb effects separately where your software supports them. If a cue masks steering, braking or tyre feedback, reduce its strength. More movement isn’t automatically more information, and strong or conflicting effects can pull your attention away from driving and may become uncomfortable.
Make one adjustment at a time, then drive the same section of track to compare the result. Keep a brief record of settings that feel clear and comfortable, so you can return to them if later changes make the profile harder to read. The aim is distinct, well-timed feedback, not constant movement.
For platform options to consider alongside your software and movement requirements, see Race@Home’s LowSlider motion platforms.
Bring rFactor 2 to life with a Race@Home LowSlider platform
Once you’ve considered software compatibility, the movement cues you want and the space around your cockpit, platform design becomes the next part of the decision. Race@Home’s LowSlider range combines a compact, ultra-low-profile design with a choice of 3DoF and 6 DOF motion platforms. Each is hand-built to order around Race@Home’s proprietary LowSlider design.
What does the LowSlider design bring to a home motion rig?
A compact footprint and ultra-low profile can be useful when planning a motion system around an existing cockpit. Measure the space available, check clearance for movement and make sure you can still reach and use your rig comfortably. The right fit depends on your room and cockpit arrangement, not just the platform’s movement capability.
The 3DoF and 6 DOF options offer different movement scopes, so your preferred cues and immersion goals can help guide the choice. Neither option replaces the software connection: a motion rig for rFactor 2 still relies on compatible motion-control software and correct configuration to translate game data into platform commands. Treat software support and platform choice as related but separate parts of the system.
What are the next steps for planning your motion setup?
Before settling on a configuration, bring the key requirements together:
- Game and software: Review current rFactor 2 support and the requirements for the motion-control software and controller combination.
- Movement: Decide which kinds of feedback matter most to your driving experience, then compare the movement scope of 3DoF and 6 DOF.
- Space and cockpit: Account for the platform footprint, movement clearance, access and existing rig layout.
- Tuning goals: Aim for movement cues that feel clear and controlled, rather than simply maximising their strength.
LowSlider platforms are shipped worldwide in four pieces designed for customer assembly. Include that in your setup plan by considering how the components will reach your rig and where you’ll assemble them.
To compare the available movement options against your cockpit and feedback priorities, explore Race@Home motion platforms.
Make your next rFactor 2 lap more immersive
A convincing motion rig for rFactor 2 is a complete system: game telemetry passes through compatible motion software and a controller before the platform turns selected cues into movement. Check that the whole combination works together, then tune gradually. More axes alone won’t guarantee a better drive; clear, comfortable feedback is what matters.
Race@Home’s LowSlider range includes hand-built-to-order 3DoF and 6 DOF motion platforms built around its proprietary design. They have a compact, ultra-low-profile form and ship worldwide in four pieces for customer assembly. Your software connection and configuration remain essential parts of the setup.
Consider which movement capability and footprint best suit your cockpit. Explore Race@Home motion platforms to compare the LowSlider options.
Frequently Asked Questions
Does rFactor 2 support motion rigs?
Yes, rFactor 2 can provide telemetry for motion systems through a shared-memory connection, but the game alone doesn’t move the platform. Compatible motion-control software must read the telemetry, map selected signals and send commands to a supported controller. Whether a particular motion rig for rFactor 2 works depends on that complete combination, including current software versions and configuration. Use the relevant documentation for your game, software and hardware when setting up the system.
How do I connect rFactor 2 to a motion platform?
Connect rFactor 2 to a motion platform through compatible motion-control software. Install the software and follow its current instructions to select the rFactor 2 profile, establish the telemetry connection and link the software to the platform controller. Then calibrate the system, check movement direction and limits, and test cautiously before driving at full intensity. The exact connection method and settings vary by software and controller, so follow their current setup guidance.
What software do I need for an rFactor 2 motion rig?
You need motion-control software that can read rFactor 2 telemetry and communicate with your motion platform’s controller. The right choice depends on both the platform hardware and the software’s current game support; a platform’s movement capability doesn’t guarantee that a particular software connection is compatible. Review the current requirements for rFactor 2, the motion software and the controller as one system. You may also need to enable or configure the game’s telemetry connection as instructed.
Is a 3DoF or 6 DOF motion rig better for rFactor 2?
Neither is automatically better; choose according to the movement cues you want and the space and cockpit you have. A 3DoF platform moves across three axes, while a 6 DOF platform can move across six, offering a broader range of potential movement. That extra range doesn’t guarantee greater realism. Software mapping, careful tuning and comfort shape the result, so consider which cues matter to your driving rather than choosing by axis count alone.
Can a motion rig reproduce traction loss in rFactor 2?
A motion rig can suggest traction loss if the platform supports the relevant movement, the telemetry connection provides suitable data and the motion software maps it appropriately. The result is a physical cue, not a literal recreation of tyre forces or the car’s full behaviour. A platform designed to include traction-loss movement may offer relevant hardware capability, but that alone doesn’t confirm a particular rFactor 2 software connection. Check compatibility across the game, software, controller and platform.
Will a motion rig work with my existing sim racing cockpit?
It may, provided the platform can be integrated with your cockpit and the whole moving setup is stable and appropriately arranged. Check the platform footprint, mounting arrangement, clearance for movement, seat position and access to your wheel and pedals. Also account for cabling and the platform’s stated hardware requirements. Compatibility isn’t just a question of whether the cockpit fits physically; the software, controller and motion platform must also work together.
How do I stop motion feedback from feeling distracting?
Begin with restrained cue levels and increase them gradually. Test braking, cornering and road effects separately where your software allows, changing one setting at a time so you can judge each effect. If motion obscures steering, braking or tyre feedback, reduce the relevant cue. Strong or overlapping movement can distract from driving and affect comfort. Keep a note of settings that feel clear, then use those as a reference when making further adjustments.


