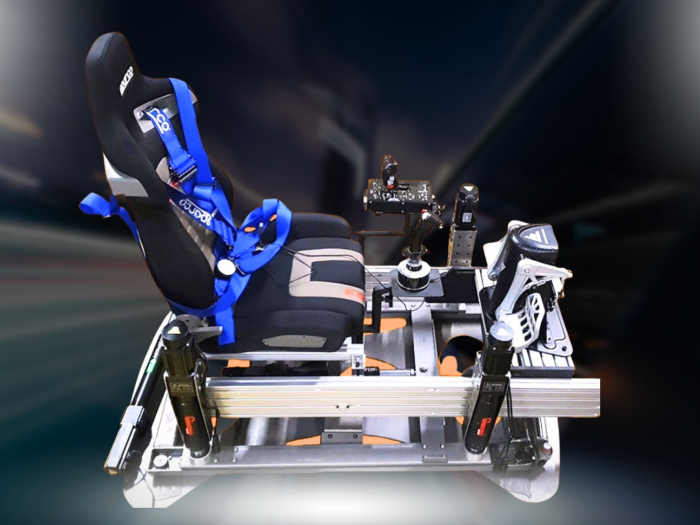

What if harsh movement isn’t caused by the actuators alone? A linear actuator motion platform turns simulation data into physical movement, so the result depends on the whole feedback chain, from hardware setup to software calibration and the motion profile.
If a platform feels inaccurate or inconsistent, it’s tempting to change settings at random. That makes it harder to tell what helped. Software can shape how telemetry becomes movement, but it can’t fix every mechanical issue or make incompatible hardware work together. That distinction matters when setting up a sim racing platform at home.
This guide explains how linear actuators create movement, what calibration software can and can’t change, and how to test adjustments in a controlled, repeatable way. You’ll learn what to check before changing settings, how to approach centre points, movement range and response, and which compatibility questions to resolve before choosing a setup. The aim is controlled, convincing feedback without guesswork.
Key Takeaways
- Learn how a linear actuator motion platform turns simulation cues into movement, and why the system’s design matters.
- Trace the control chain from telemetry to software, controller and actuators, then identify what calibration can and can’t change.
- Compare calibration software by hardware compatibility, supported movement axes, adjustment clarity, documentation and update status.
- Use a cautious setup sequence: check the manuals and rig, establish a baseline, calibrate, then test changes incrementally.
- Before choosing a platform, confirm software, hardware, space and safety requirements, then compare them with the LowSlider 6 DOF and 3DoF options.
What does a linear actuator do in a motion platform?
A linear actuator produces controlled movement along a straight path. In a linear actuator motion platform, one or more actuators move parts of the rig, while the platform’s design combines those movements to create physical cues as you race. The number and position of the actuators, and how they work together, vary by system. The platform’s mechanical design and control setup determine how it moves.
This movement is distinct from what you see on screen and what you feel through the steering wheel. The display shows the car’s motion visually, while wheel force feedback applies forces through the controls. A motion platform moves your seat or rig to add physical cues. Together, these channels can make a simulation feel more immediate, but they don’t reproduce every force acting on a real car and driver.
How does linear movement become a sim racing cue?
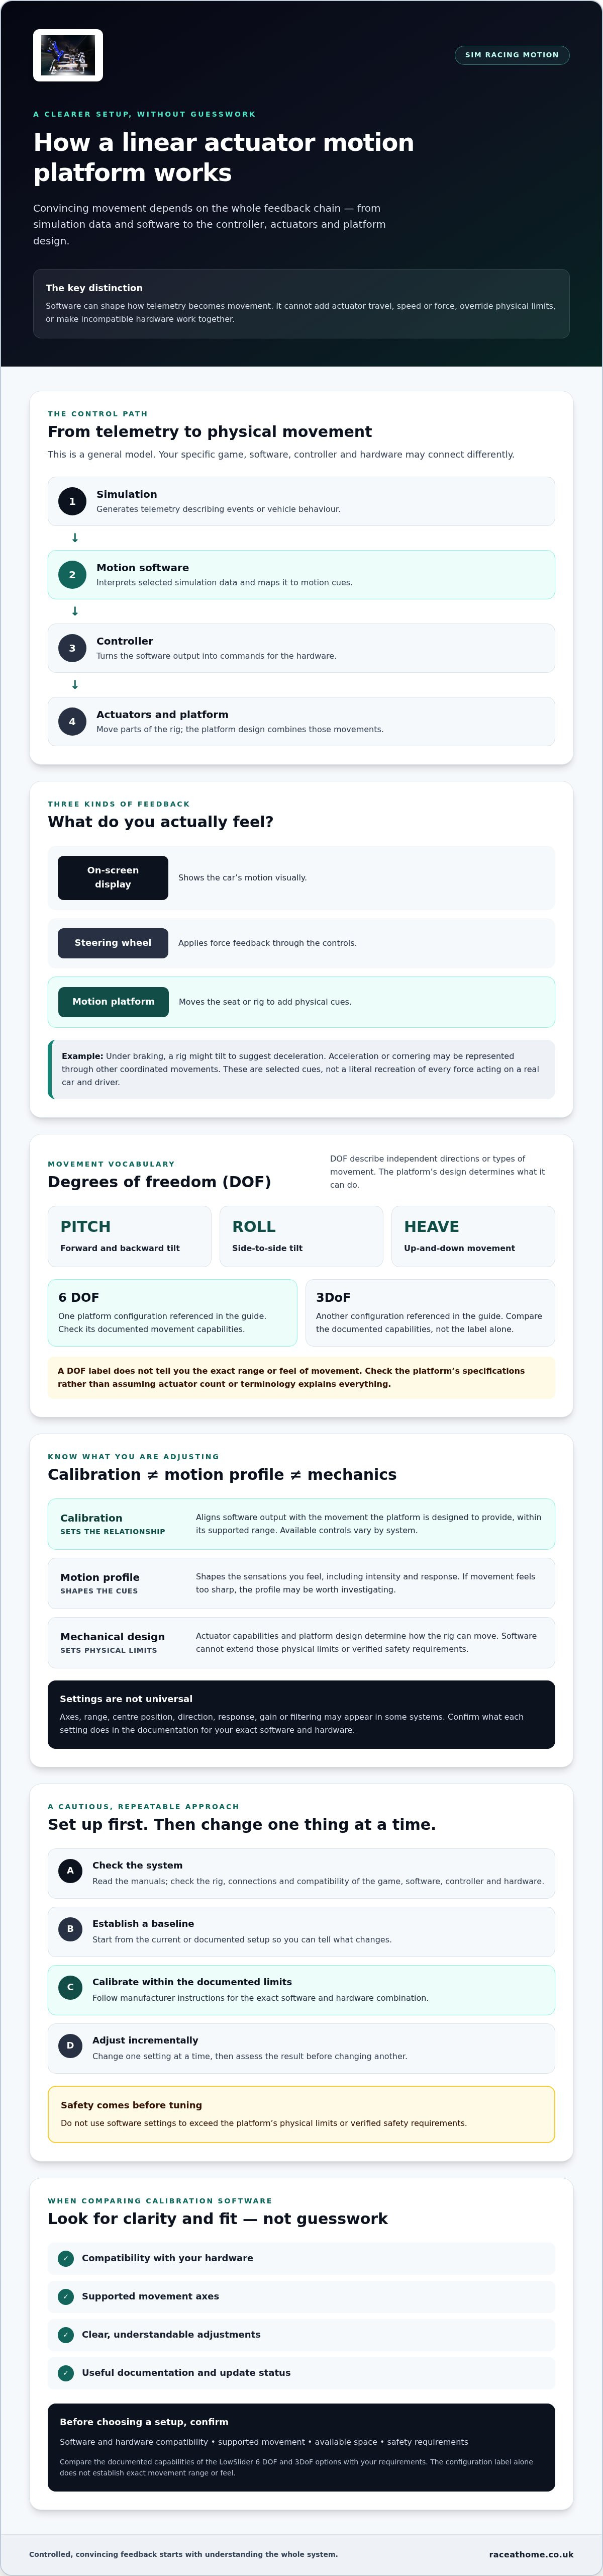
Motion software reads simulation data and maps selected events to platform movement, within the capabilities of the software and hardware. Under braking, for example, the rig might tilt to suggest deceleration. Acceleration or cornering may be represented through other coordinated movements. These are motion cues, not a literal recreation of the car’s forces. The platform conveys selected sensations to complement what you see and feel at the controls.
What do degrees of freedom mean for actuator platforms?
Degrees of freedom (DOF) describe the independent directions or types of movement a platform can produce. Familiar examples include pitch (tilting forwards and backwards), roll (tilting from side to side) and heave (moving up and down). A platform’s DOF depends on its design. The label alone doesn’t describe the exact range or feel of movement, so check the documented capabilities when comparing systems. For a broader explanation of platform configurations, read this 6 DOF motion simulator guide.
Some multi-axis designs coordinate several linear actuators to move a platform in different directions. A Stewart platform, for example, uses linked supports to achieve six-axis movement. That’s one design approach, not a description of every sim racing system. Check the platform’s documented movement capabilities rather than assuming actuator count or DOF terminology tells the whole story.
How does calibration software control a linear actuator motion platform?
Think of the control path as a chain: the simulation generates telemetry, motion software interprets selected data, a controller turns the software’s output into commands, and the actuators move the platform. This is a general model, not a guarantee that every rig uses the same architecture. Before changing settings, check how your specific game, software, controller and hardware connect, and confirm that they’re compatible.
Calibration aligns software output with the movement the platform is designed to provide. It helps establish usable behaviour, such as how an output corresponds to physical movement, within the system’s supported range. It doesn’t add travel, speed or force to an actuator. Software cannot override a platform’s physical limits or its verified safety requirements.
Keep calibration separate from a motion profile. Calibration sets up the relationship between software commands and available movement. A profile shapes the cues you feel, including their intensity and response. If movement feels too sharp, the profile may be the place to investigate. First, identify which setting controls that behaviour in your particular software.
Which settings might calibration software expose?
Depending on the system, you may see settings for movement axes, range, centre position, direction or response. These labels and adjustments aren’t universal. They vary by software, controller and platform, so treat them as examples rather than a checklist of features every product should have. Before changing a setting, consult the documentation for the exact software and hardware combination, and follow the manufacturer’s instructions for allowable values.
How do telemetry and motion profiles affect the result?
Telemetry is data describing events or vehicle behaviour in the simulation. Motion software can use selected data to generate cues, but the result depends on what the game supplies and how the system processes it. Settings such as gain or filtering may affect cue strength or smoothness in some software. Check the software documentation to confirm what each setting does. Change one setting at a time, then assess the result rather than adjusting several variables together.
For related context on sim racing equipment and feedback, see this guide to sim racing motion feedback. The FAA flight simulator qualification standards include evaluation of motion cueing and platform response. Those standards apply to qualifying flight simulators, not home sim racing rigs, so use them as background rather than as a setup rule for your platform.
If you’re comparing platform options, review the motion platforms available from Race@Home. Confirm software and hardware compatibility before choosing a setup.
How should you compare motion platform calibration software?
Start with compatibility, not a feature list. Calibration software is only useful if it works with the exact actuator controller, simulator software and telemetry pathway in your setup. Check each connection against current documentation, then compare the adjustments available. A software name or feature list alone doesn’t establish that a linear actuator motion platform will work with it.
Which compatibility checks matter before choosing?
Check the software vendor’s current list of supported hardware and controllers. Confirm that your simulator titles, telemetry interfaces, operating system and connection method are supported too. Compatibility depends on the whole chain, so a match at one point doesn’t prove the full setup will work. Any claimed compatibility with Race@Home, LowSlider platforms or PT Actuator hardware needs to be checked against the relevant product and software documentation.
| Comparison point | What to verify |
|---|---|
| Compatibility | Exact platform, actuator controller, simulator titles, telemetry interface, operating system and connection method. |
| Supported axes | Which movement axes the software can address, and whether these match your platform’s documented capabilities. |
| Adjustment clarity | Whether settings and units are explained clearly, and whether you can tell what an adjustment changes. |
| Documentation | Setup instructions, troubleshooting guidance and information specific to your hardware and software versions. |
| Update status | Whether the software is maintained, and whether current releases still support your operating system and connected hardware. |
How can you judge usability and support?
Look for clear terminology, practical documentation, saved profiles and diagnostic information that can help identify where a connection or output problem occurs. Check whether you can make small adjustments, test them and restore a known baseline. These are useful comparison points, but they don’t make one tool universally better. A feature is a verifiable capability; whether its interface feels intuitive depends on your own workflow.
For broader advice on matching equipment across a sim racing setup, read the sim rig motion platform compatibility guide.
Quick screening checklist: Confirm that the software supports your exact controller, platform, simulator, telemetry interface, operating system and connection method. Then check its supported axes, adjustment documentation and current update status.
How do you calibrate a linear actuator motion platform safely?
A safe setup starts with the manufacturer’s instructions, not a value guessed from another rig. A linear actuator motion platform may look similar to another system but have different limits, controls and procedures. Follow the manuals for your exact platform, controller and software, especially for movement limits, required clearances, emergency stops and any isolation procedure. Don’t bypass interlocks, covers or limits.
What should you check before the first calibration test?
Before powering or moving the rig, check that assembly and mounting follow the instructions. Review cable routing and confirm the platform has the specified clearance, with no people, loose objects or obstacles in the moving area. Make sure the system is in its documented starting state and that the controls respond as expected. If a check fails or you’re unsure what a control does, stop and consult the manufacturer’s instructions before proceeding.
How can you test calibration without chasing settings?
Work methodically. Establish a baseline first by recording the current settings and noting how the platform behaves. Then confirm direction and centring using the manufacturer’s approved procedure before assessing more complex movement cues.
- Use a controlled, low-intensity test profile, if the software and manufacturer provide or permit one.
- Change one setting at a time, in small increments that remain within documented limits.
- Record each original value, adjustment and observed effect so you can distinguish cause from coincidence.
- Keep a known-good profile or settings record, where available, so you can restore the baseline if behaviour becomes inconsistent.
Pause between adjustments and check whether the result matches the intended change. If it doesn’t, return to the recorded baseline before trying anything else. Avoid copying numerical settings from another platform. Values only make sense in the context of the exact hardware, software and instructions they were verified for.
Stop immediately if you notice abnormal noise, binding, unexpected movement or a system fault. Don’t continue testing or try to overcome the problem by changing software settings. Follow the manufacturer’s stop and isolation instructions, and seek qualified support before using the system again.
A repeatable process supports confidence and consistency: inspect, record, adjust cautiously, test and stop if anything seems wrong. To explore motion platform options as you plan a setup, view Race@Home motion platforms.
How can Race@Home help you choose a motion platform setup?
Choosing a platform is easier when you consider the full setup, not just the actuator count. Think about what you race, the cockpit and controls you already own, the space available, and whether the system is for private or commercial use. Then check that the platform, controller, simulator and telemetry route can work together, and that the arrangement can be operated safely in your space.
Race@Home designs and hand-builds LowSlider 6 DOF and 3DoF motion platforms, and supplies sim racing hardware and Pimax VR headsets. The platforms have compact, low-profile designs, which may be worth considering if floor space or rig height is a constraint. Hand-built construction is a product characteristic, not a promise of a particular movement quality or calibration outcome. Confirm software and hardware compatibility for the exact configuration rather than assuming it.
What should you confirm before contacting a platform specialist?
Prepare a concise setup brief before comparing options. Include:
- The simulator titles you use and whether the rig is for private or commercial use.
- Your cockpit, seat, controls and other components that will move with the platform.
- The space available, including room for the platform’s movement and access around the rig.
- Any known controller, actuator and motion software details, including version numbers where available.
Use this information to identify the questions that need a definite answer: which components are compatible, what calibration information is documented for the proposed configuration, and what clearances and operating requirements apply? Check claims against current product manuals and software documentation. A match between one component and a platform doesn’t prove that the complete chain is compatible.
When is a hand-built motion platform worth considering?
A hand-built platform may suit buyers who value specialist construction and are comparing a compact, low-profile form factor with their available space. Race@Home’s LowSlider range includes 6 DOF and 3DoF options, but the right choice depends on your use case and the movement capabilities you want. Confirm the dimensions, required clearances, assembly details and software compatibility for the specific option before deciding.
Race@Home supplies motion platforms and sim racing hardware. It doesn’t develop sim racing software or provide a turnkey rig installation service, so plan software selection and system assembly accordingly. Once your requirements and compatibility questions are clear, explore Race@Home motion platforms and compare the available options against your setup.
Build a motion setup you can trust
A convincing motion experience depends on more than actuator travel. Your linear actuator motion platform needs a well-matched chain of hardware, telemetry and software, calibrated within the platform’s documented limits. Compare options by confirmed compatibility and clear documentation, then establish a baseline and make careful, recorded adjustments. If movement is abnormal or unexpected, stop rather than trying to correct it through software.
Race@Home designs and hand-builds compact, low-profile LowSlider 6 DOF and 3DoF motion platforms for private and commercial use. These are physical design characteristics, not promises of particular calibration results. Before choosing, confirm that the platform suits your space and intended use, and verify software and hardware compatibility for your exact setup.
Once you’ve defined your requirements, explore Race@Home motion platforms and compare the available options. Use your setup requirements to decide which option to consider, and contact Race@Home to discuss its motion platforms and sim racing hardware.
Frequently Asked Questions
What is a linear actuator motion platform?
A linear actuator motion platform uses devices that produce controlled movement along a straight path to move a seat, cockpit or rig. The platform’s design combines actuator movements to create selected physical cues from a simulation. Systems differ in their mechanics and available movement, so actuator number alone doesn’t tell you what a platform can do. Motion complements what you see on screen and feel through steering controls, rather than reproducing every force of driving.
How do you calibrate a linear actuator motion platform?
Start by reading the instructions for your exact platform, controller and software. Inspect the assembly, mounting, cable routing and movement clearance, then establish and record a baseline. Follow the documented calibration procedure, checking direction and centre before testing with a controlled, low-intensity profile. Change one setting at a time and note its effect. Don’t guess limits or copy another rig’s values. Stop if you notice abnormal noise, binding, unexpected movement or a fault.
What does motion platform calibration software do?
Calibration software helps align software output with the movement available from the platform and its control system. Depending on the system, it may provide adjustments for settings such as centre, direction or movement range, but features vary and must be checked in the specific documentation. A motion profile shapes how strongly or quickly cues are presented. Neither calibration nor a profile can increase an actuator’s physical capability or override safety requirements.
Can I use any calibration software with linear actuators?
No. Software must be compatible with the platform’s controller and hardware, as well as the simulator, telemetry interface, operating system and connection method. Check the software vendor’s current documentation against the exact equipment and versions you plan to use. A tool that supports one part of the chain may not support the complete setup. Don’t assume compatibility with a particular platform or actuator brand unless the relevant documentation confirms it.
Why does my motion platform move in the wrong direction?
Unexpected direction can result from software axis mapping, a direction setting, a profile or controller configuration, but the cause depends on the system. Stop testing if movement is unexpected. Consult the platform and software instructions to check the intended direction and documented settings. Don’t reverse wiring, bypass limits or adjust unfamiliar controller parameters by guesswork. If the cause isn’t clear, stop using the platform and seek guidance from the manufacturer or a suitably qualified person.
Do I need to calibrate my motion platform every time I race?
Usually, calibration isn’t something to repeat before every race if the setup hasn’t changed and the platform behaves as expected. Follow the manufacturer’s instructions for routine checks. Revisit calibration if you change relevant hardware or software, move or reassemble the rig, or notice a change in its behaviour, but use the documented procedure rather than assuming a full recalibration is needed. If movement becomes abnormal, stop and investigate before driving again.


