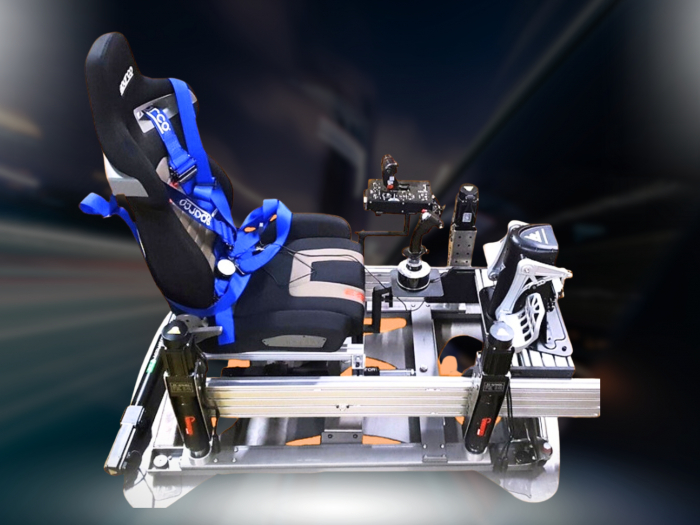

More degrees of freedom don’t automatically mean a better fit. In a professional vs DIY motion simulator comparison, a professionally engineered system prioritises integrated motion and a more predictable setup, while a DIY build gives you greater control over components at the cost of more design, assembly and tuning work. A 2DOF platform typically reproduces pitch and roll; a 6DOF system can reproduce movement across all six degrees of freedom.
It’s understandable to focus first on the purchase cost, but the real trade-off also includes the time and skills needed to get a simulator running smoothly. This guide compares immersion, overall cost, installation, software and hardware compatibility, technical demands and setup time, so you can judge which route suits your rig and experience. You’ll see where a purpose-built platform differs from a home-built project, and how to weigh the practical compromises before choosing.
Key Takeaways
- Compare motion by the forces and directions a platform reproduces, not simply by its degree-of-freedom count.
- Weigh the full DIY commitment: components, cockpit fit, compatibility, construction and tuning all shape the finished experience.
- Choose a professional system if you value an integrated platform and a more straightforward route to a complete setup; DIY suits those ready to build and troubleshoot.
- Use your space, technical confidence and desired level of immersion to decide whether Race@Home’s LowSlider platforms are a suitable next step.
Motion platform immersion compared with real racing forces
Professional and DIY motion simulators can both turn telemetry into physical cues, but consistency depends on design, tuning and build quality. Neither reproduces sustained racing forces. Instead, each platform creates movement cues that suggest acceleration, braking and cornering.
For immersion, match the platform’s movement to the cues you want to feel. A seat mover and a full-motion rig offer different ranges of movement, not simply different levels of quality.
Degrees of Freedom and Platform Motion
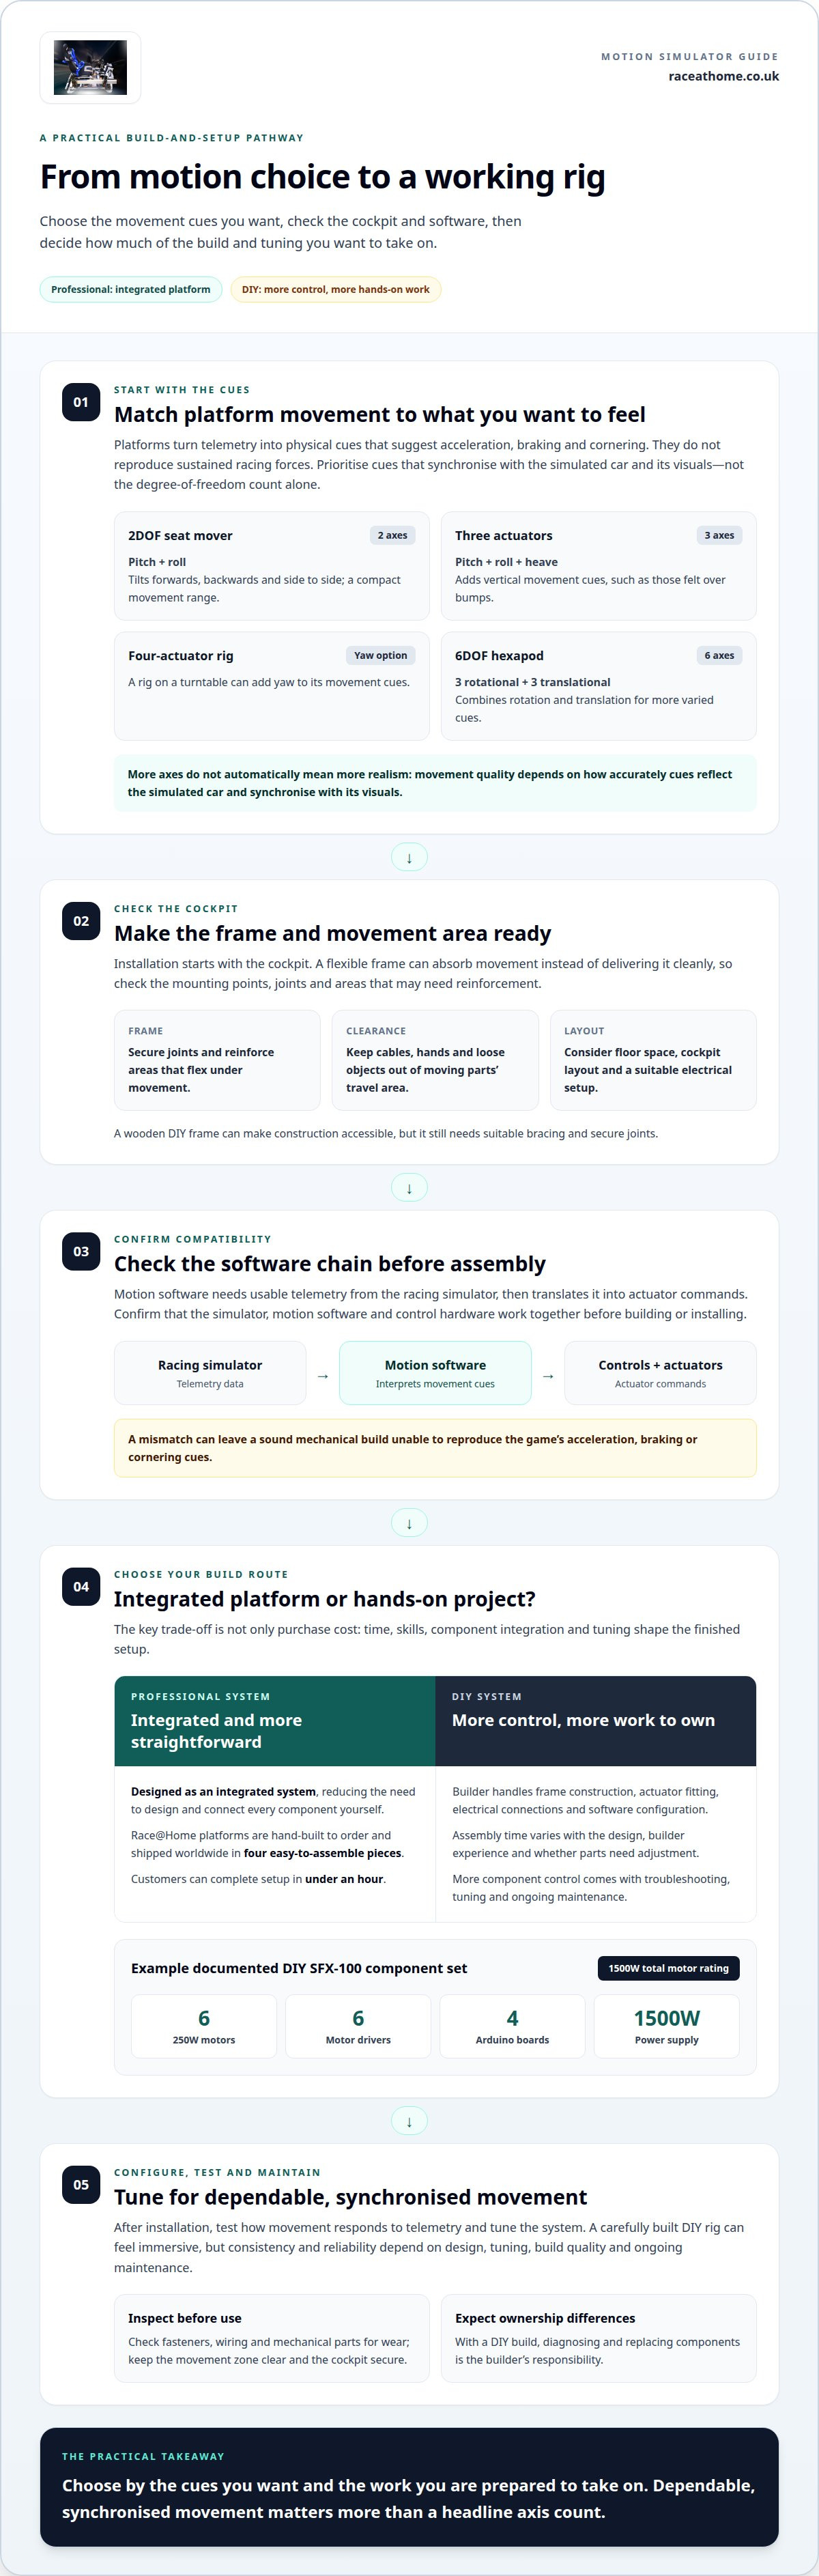
Degrees of freedom describe the directions a platform can move. A typical 2DOF seat mover reproduces pitch and roll, tilting you forwards, backwards and side to side. Three actuators can add heave, the vertical movement felt over bumps. A 6DOF hexapod adds three rotational and three translational movements, creating more varied cues than a basic seat mover.
More axes don’t automatically mean more realism. A four-actuator rig on a turntable can add yaw, while a 6DOF platform can combine translation and rotation. The result depends on how accurately motion reflects the simulated car and how closely movement synchronises with its visuals.
Performance, Reliability and Realism
Professional platforms are designed as integrated systems, whereas a DIY SFX-100 build depends on the builder’s component choices, assembly and tuning. That affects how consistently telemetry becomes smooth movement. A carefully built DIY system can feel immersive, but reliability depends on the quality of its construction and ongoing maintenance.
A ready-to-use platform reduces the need to design and integrate every component yourself. DIY gives you more control, but troubleshooting can become part of ownership. A common regret is choosing a platform for its headline movement range, then finding that its cues don’t match the visuals or the intended software.
| Option | Motion | Key trade-off |
|---|---|---|
| 2DOF seat mover | Pitch and roll | Compact movement range |
| Three-actuator platform | Pitch, roll and heave | Adds vertical cues |
| 6DOF hexapod | Rotation and translation | More complex system |
| DIY SFX-100 | Depends on the build | More design and tuning |
Prioritise synchronised cues and dependable operation over the number of axes alone.
Installation, cockpit reinforcement, and compatibility
Installation starts with the cockpit, not the actuator software. A motion platform transfers acceleration and braking cues to the frame, so a flexible rig can absorb movement instead of delivering it cleanly. Check how the platform mounts, where its moving parts travel and whether cables stay clear throughout the full range of motion. A wooden DIY frame, for example, makes construction accessible but still needs suitable bracing and secure joints.
Moving mechanisms can create pinch and impact hazards if hands, cables or loose objects enter their travel area. Keep the movement zone clear, secure the cockpit, and inspect fasteners, wiring and mechanical parts for wear before use. Maintenance depends on the design. With a DIY build, the builder is also responsible for diagnosing and replacing components.
Software compatibility is another installation consideration. Motion software must receive usable telemetry from the racing simulator and translate it into actuator commands. Before assembling a DIY system, identify the sim software you intend to use and confirm that the control hardware and motion software work with it. A mismatch can leave a sound mechanical build unable to reproduce the game’s acceleration, braking or cornering cues.
A purpose-built platform can reduce fabrication and assembly work. Race@Home hand-builds its platforms to order and ships them worldwide in four easy-to-assemble pieces. Customers can complete setup in under an hour. That differs from a DIY build, where frame construction, component integration and software configuration are part of the project. Installation still depends on available floor space, cockpit layout and a suitable electrical setup.
- Frame: secure joints and reinforce areas that flex under movement.
- Clearance: keep cables and objects outside the platform’s travel path.
- Compatibility: match the motion software and controls to the racing simulator.
- Maintenance: inspect fasteners, wiring and moving components regularly.
For either route, settle the cockpit layout and software compatibility before installation. These decisions shape the mounting, wiring and setup work that follows.
DIY skills, assembly time, and software
A DIY motion simulator demands more than mechanical assembly: you must also integrate its controls and software. A documented build uses six motors, six motor drivers, four Arduino boards and a 1500W power supply.
DIY Skills and Assembly Time
Building a system such as the SFX-100 involves constructing a frame, fitting actuators and connecting electrical components. The builder must then configure the controls and test how movement responds to telemetry. Each stage adds hands-on work beyond assembling a ready-to-use platform.
There’s no standard assembly time for a DIY project. It depends on the design, the builder’s experience and whether parts need adjustment. A wooden frame, for example, still needs to be cut, joined and reinforced. Allow time for testing and tuning, not just construction.
Components and Software
A documented DIY simulator uses six 250W motors, with a total motor rating of 1500W, plus a 1500W power supply and six motor drivers. Its control system also uses four Arduino boards. Together, these components turn simulator telemetry into actuator movement.
Software integration is essential. Motion software must interpret data from the racing simulator and send suitable commands to the actuators. For example, braking telemetry should trigger a corresponding movement cue. If the software and controls don’t communicate correctly, the hardware can’t produce the intended response.
Gago Meisler programmed actuators to move in sequence with flight-simulator controls, illustrating the programming a custom build can involve. The same principle applies to sim racing: the motion system needs to interpret racing inputs and coordinate the actuators. This is separate from assembling the frame or wiring the motors.
DIY suits builders prepared to manage mechanical assembly, electrical integration and software configuration as one project. If you’d rather spend less time engineering the system, a purpose-built platform reduces those tasks, though setup and software compatibility still matter.
Professional motion simulator models
Professional motion simulators use different mechanisms, and the design shapes how movement reaches your cockpit. A professional vs DIY motion simulator comparison should therefore look beyond labels such as “full motion”. Consider how each model delivers cues, how it fits your setup and what compromises its mechanism brings.
A seat mover tilts the seat to suggest cornering and braking forces. Its compact arrangement suits a racing cockpit where space matters, but movement is concentrated around the seat. If the screen remains stationary, your body may feel motion while the visuals appear fixed. That disconnect can weaken immersion, even when the hardware is moving.
Four-post platforms move the rig through posts beneath the cockpit, creating pronounced tactile cues. Their straightforward layout can simplify setup, but movement may feel forceful rather than closely matched to a car’s physics. Because the actuators sit away from the cockpit’s centre of mass, movement can feel less natural or disconnected from what you see.
Centre-of-mass systems place motion around the point where the cockpit’s mass is balanced. This approach aims to produce physics-based cues with greater accuracy, though manufacturing is more complex. Stewart hexapods coordinate linked actuators to create movement in six degrees of freedom. Their linked axes and recentering behaviour can influence how cues feel in practice.
Professional flight simulators often pair hydraulic motion with realistic flight controls. This illustrates why intended use matters: aircraft cues and racing cues aren’t interchangeable. For a racing rig, prioritise independent movement, synchronised visuals, tunability and support for your simulation software. A greater range of movement alone won’t make the experience more realistic. When comparing professional and DIY options, judge how well the complete system delivers the cues you want.
- Choose a seat mover when a compact footprint is a priority.
- Consider a four-post system for pronounced tactile feedback.
- Look at centre-of-mass or hexapod designs when cue accuracy and coordinated motion matter most.
Explore professional motion simulator options to compare designs for your racing setup.
Race@Home
Race@Home gives you a professional alternative when you want physical feedback without designing and building a motion system yourself. Its LowSlider range includes a 6 DOF Twin-Traction-Loss platform and a 3DoF motion platform, designed for racing immersion with a compact footprint. Each simulator is hand-built to order around the LowSlider design.
The choice depends on the movement you want, your cockpit and how much DIY assembly you’re prepared to take on. Race@Home’s LowSlider platforms ship in four pieces for customer assembly, with setup possible in under an hour. Pimax VR headsets and sim racing accessories can also complement a sim racing setup.
If you’re weighing a purpose-built platform against a DIY build, contact Race@Home to discuss your motion simulator requirements.
Choose the setup that fits your next step
Before committing, decide what you want your sim racing sessions to feel like and how much of the engineering you want to take on. Choosing a professional vs DIY motion simulator isn’t just about hardware; it’s also about the kind of project you want. If building, configuring and refining a system is part of the appeal, DIY may suit you. If you’d rather focus on selecting a purpose-built platform for your rig, explore Race@Home’s motion platforms.
Make your priorities clear: the sensations you value most, the space available, and your appetite for hands-on work. That short brief can make the next decision more focused, without getting lost in specifications that don’t match your use. If you’re ready to discuss a motion setup for your sim racing goals, contact Race@Home. Your ideal rig starts with a clear picture of the experience you want.
Frequently Asked Questions
What is the difference between a professional and DIY motion simulator?
A purpose-built system is designed and assembled as a complete motion platform, while a DIY simulator is built and integrated by its owner. The purpose-built route reduces the mechanical and electronic design you manage yourself. DIY offers more control over component choices, but also makes you responsible for assembly, calibration and resolving build issues. The better fit depends on whether you’d rather drive or engineer.
How much does a professional motion simulator cost in the US?
There isn’t one standard US price for a professional motion simulator. The total depends on the platform model, motion capability, included hardware and configuration. Consider the complete setup rather than comparing platforms alone: cockpit requirements and additional equipment also affect the investment. For a useful comparison, define the functions you need first, then assess systems against those requirements and the overall configuration.
How much does it cost to build a DIY motion simulator?
DIY build costs depend on the design and parts you select, so a single estimate won’t apply to every project. Budget for the frame, motion hardware, electrical components and control system, as well as tools or replacement parts needed during construction. Your existing cockpit and equipment also affect what you need to buy. Compare the complete parts list with the effort required to assemble and tune the system.
What motion platforms and degrees of freedom are available for simulators?
Simulator platforms span systems with one to six degrees of freedom, depending on their design and intended use. A three-degree-of-freedom platform and a six-degree-of-freedom platform offer different movement ranges; the higher figure alone doesn’t establish which feels more convincing. For example, Race@Home offers a LowSlider 3DoF motion platform and a LowSlider 6 DOF Twin-Traction-Loss Motion Platform. Choose by the cues and setup you want.
How difficult and time-consuming is it to build and calibrate a DIY motion simulator?
Building a DIY simulator can be demanding because construction is only part of the work. You’ll need to assemble the structure, integrate the controls and configure how telemetry drives movement. Calibration means testing how the platform responds to the simulation and refining its settings. The time required depends on the design, your experience and how much adjustment the build needs before its cues feel coherent.
What software and games are compatible with professional and DIY motion simulators?
Compatibility depends on whether the motion system can receive telemetry from a particular simulation and translate it into actuator commands. Professional and DIY systems may use different control software, so compatibility isn’t guaranteed across every game. The key factors are telemetry support, the motion software’s interface and suitable drivers. A game that doesn’t provide usable motion data can’t send its braking or cornering cues to the platform.


