
What if the most immersive rig isn’t the one with the most hardware, but the one where every cue arrives in step? A sharper view, responsive wheel and convincing feedback can each add to the experience, but an immersive racing simulator setup depends on how well those elements work together. It’s natural to wonder which upgrades matter most, whether components will integrate smoothly and how to make the most of a limited room.
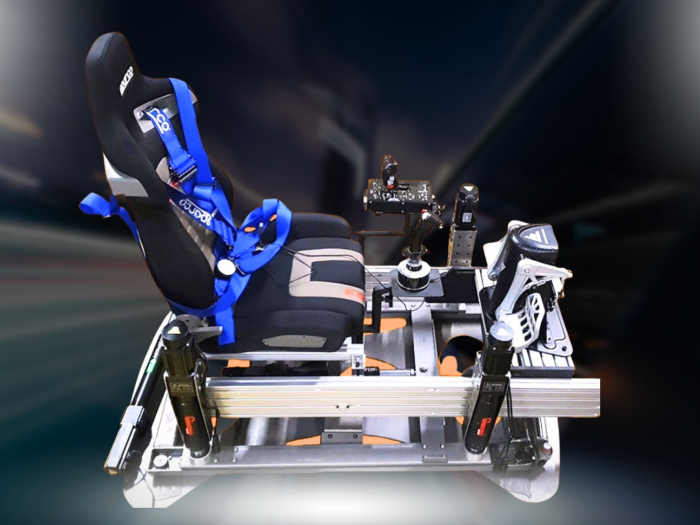
Start with the driving experience you want, then treat immersion as a connected system rather than a shopping list. Visuals, controls, sound and motion each have a role, and their settings should reinforce one another. Before adding hardware, check your space and component requirements, then test the core rig. Motion translates simulation data into physical cues, so it should complement well-tuned visuals and controls, not compensate for them. For home rigs where footprint matters, Race@Home’s LowSlider motion platforms have an ultra-low-profile, compact design that can add another sensory layer to a considered set-up.
Key Takeaways
- Build your immersive racing simulator setup around the driving experience you want, rather than choosing components in isolation.
- Compare screens and VR by sightlines, room layout and personal preference to find a visual approach that suits your space.
- Plan in order: set priorities, measure the room, consider compatibility, then assemble and test before upgrading.
- Account for movement, access, ventilation and cable routing when deciding where your cockpit and equipment will sit.
- Explore how LowSlider 3DoF and 6 DOF Twin-Traction-Loss platforms can add physical cues to a carefully balanced rig.
What Makes an Immersive Racing Simulator Set-up Feel Convincing?
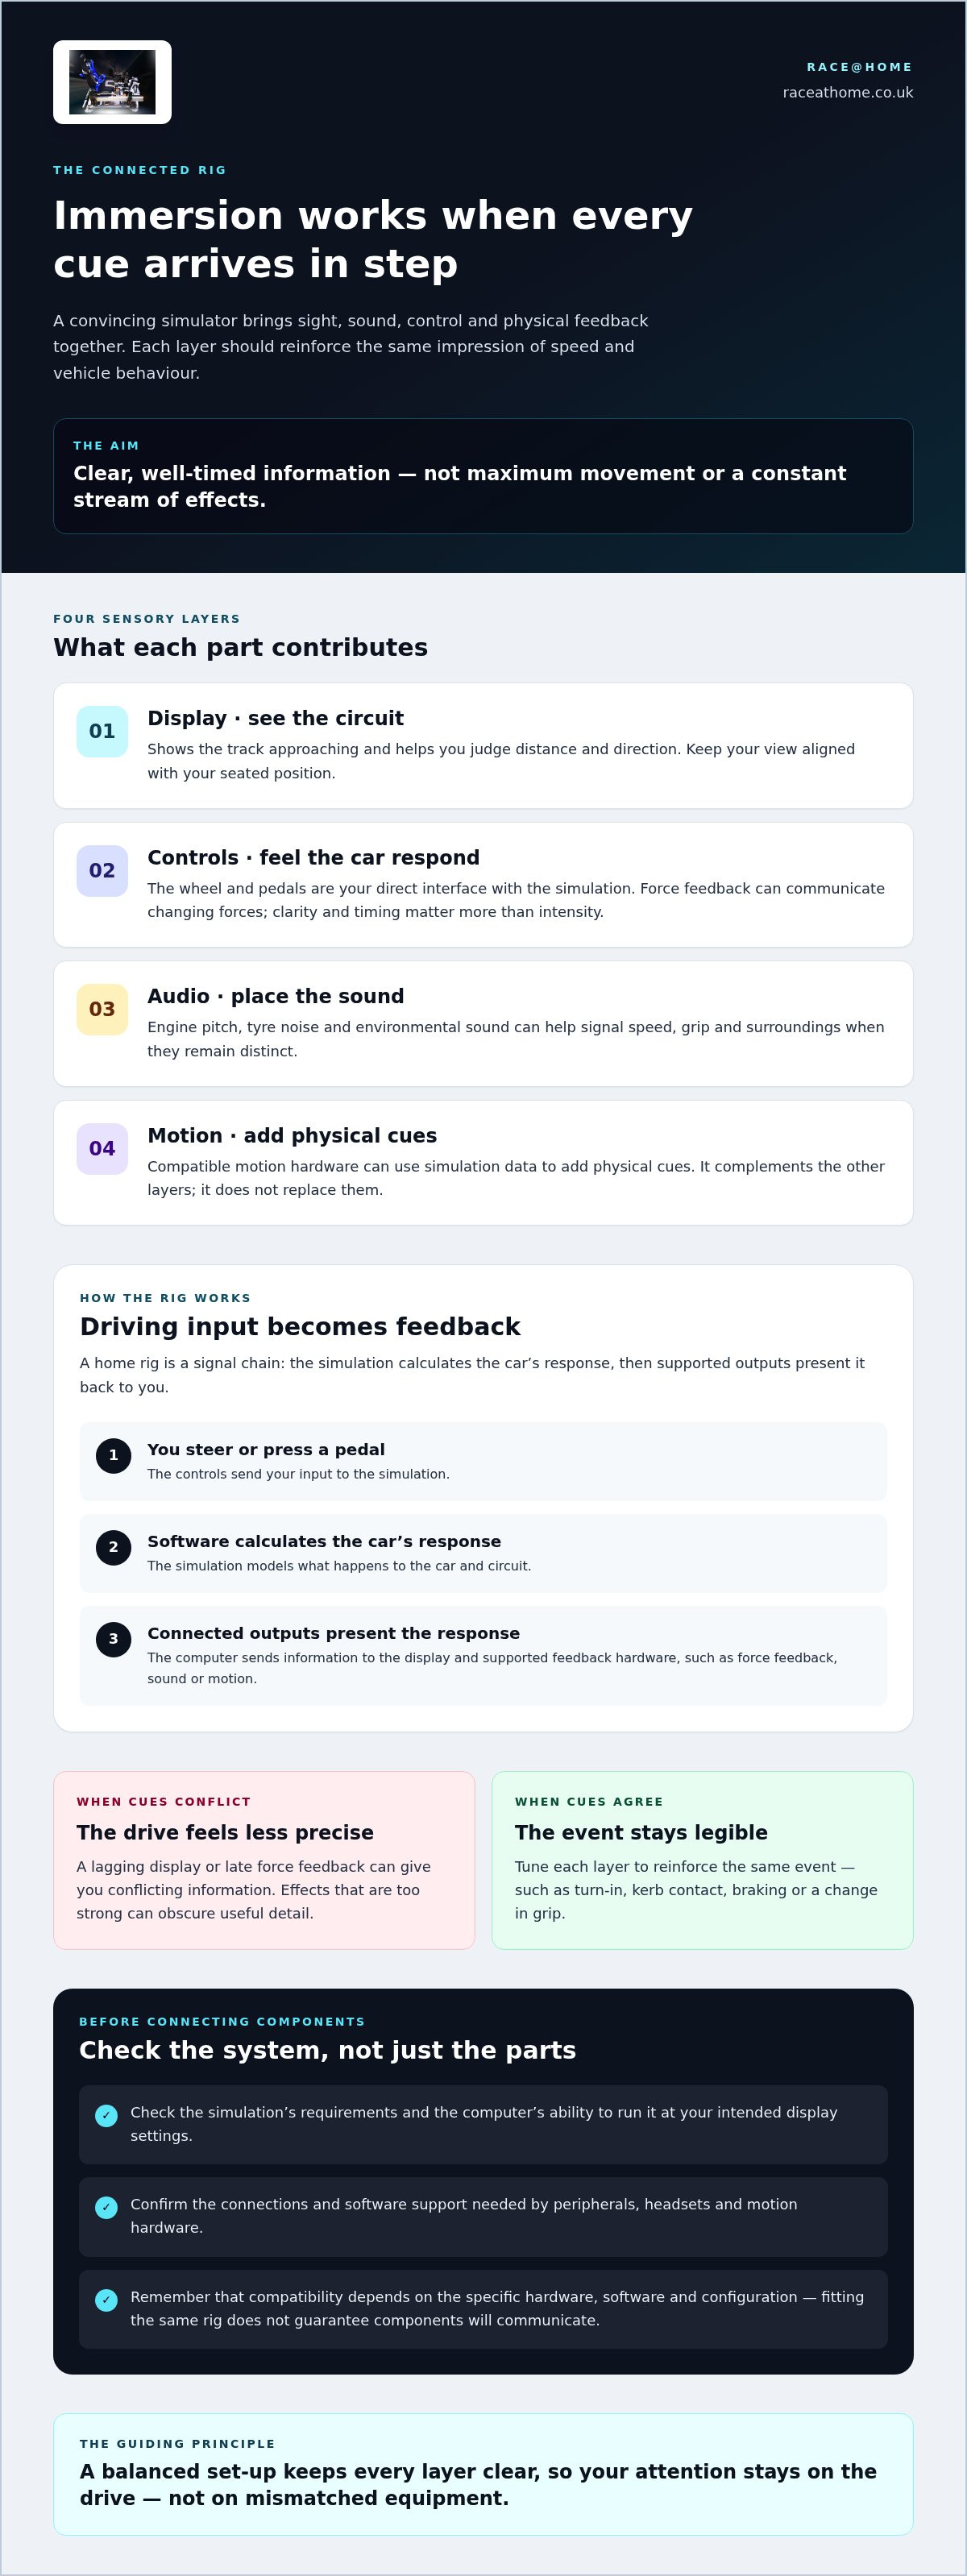
A convincing simulator brings sight, sound, control and physical feedback into a coherent experience. The display shows the track approaching, the wheel responds as the car loads into a corner, and audio helps place the engine and tyres in the scene. Each layer should support the same impression of speed and vehicle behaviour.
An immersive racing simulator set-up is a group of connected components that makes what you see, hear and feel respond consistently to your driving. It isn’t defined by one specification or a single purchase. A powerful wheel can feel disconnected if it’s poorly configured, just as motion adds little when its cues don’t correspond to what’s happening on screen.
Timing matters. If the display lags behind your steering input or force feedback arrives late, you receive conflicting information. Effects that are too strong can also obscure useful detail. Tune each layer to reinforce the same event, such as turn-in, kerb contact, braking or a change in grip. For background on simulation and equipment, Sim racing offers a broad overview.
How does a simulator turn driving inputs into feedback?
You turn the wheel or press a pedal, and the controls send that input to the simulation. The software calculates the car’s response, then presents it through supported outputs such as on-screen movement, force feedback, sound or motion. Vehicle data, often called telemetry, can inform compatible feedback systems about events such as acceleration or changes in the car’s behaviour. What a system can represent depends on its design and software support.
The goal is not maximum movement or a constant stream of effects. It’s clear, well-timed information. A cue that corresponds to a change in the car can help you interpret what’s happening; movement without a meaningful connection can distract you. If an effect masks steering detail or arrives out of step with the image, reduce or adjust it.
Which sensory layers shape the experience?
The display establishes your view of the circuit and helps you judge distance and direction. The steering wheel communicates changing forces, while the pedals let you modulate braking and acceleration. Seat position matters too: a comfortable, stable posture helps you reach the controls consistently and keep your view aligned with the display.
Audio adds another layer. Engine pitch, tyre noise and environmental sound can help signal speed, grip and surroundings, especially when they remain distinct rather than overwhelming one another. Motion can add physical cues linked to simulation data, giving you another way to sense the car’s response. It complements the display, controls and audio, but cannot replace them. A balanced immersive racing simulator setup makes each layer clear, so your attention stays on the drive rather than on mismatched equipment.
How the Main Components of an Immersive Racing Simulator Work Together
A home rig works as a signal chain. You make an input at the wheel or pedals, the simulation software calculates how the virtual car responds, then the computer sends information to the display and connected feedback hardware. The cockpit holds the controls and screen in a consistent position, while optional motion can add physical cues. If one part of this chain is poorly matched or configured, the whole experience can feel less precise.
Compatible components provide the ingredients, but thoughtful configuration makes them work as a system. An immersive racing simulator setup depends on suitable software and hardware support, sensible settings and feedback that corresponds to what you see and do. Before buying connected components, check the manufacturers’ requirements and supported connections, particularly for motion hardware and VR headsets. Compatibility can depend on the specific software, hardware and configuration, so don’t assume components will communicate simply because they fit the same rig.
What should the computer, software and display each contribute?
The computer runs the simulation, processes its graphics and handles communication with connected peripherals. The software models the car and circuit, then provides the visual and vehicle data that supported devices may use. The display presents the track and car position; its resolution and format influence the computer’s workload. Performance requirements therefore depend on the software, chosen resolution and connected hardware, rather than one universal specification.
Before choosing a computer or display, check the requirements for your simulation and, if you plan to use one, the headset. Confirm that the computer can run the software at your intended display settings, and check which connections the peripherals need. This helps you avoid choosing a screen or headset that the rest of the system can’t drive as intended.
How do controls and motion translate vehicle behaviour?
Steering and pedal inputs are your direct interface with the simulation. A stable cockpit helps keep them in position, while appropriate control settings let you make repeatable inputs and read the car’s response. Force feedback can communicate changing forces through the wheel; its usefulness depends on clarity and timing, not simply intensity.
Motion hardware uses supported simulation data, often called telemetry, to produce physical cues. Depending on the system and its software support, those cues can represent aspects of the car’s movement. The aim is for each cue to correspond to an event in the simulation, rather than add movement for its own sake. For a closer look at the principles behind 6 DOF motion simulators, explore how multiple movement cues can contribute to a rig. Race@Home’s LowSlider motion platforms can provide this physical-feedback layer within a considered system.
Think through the chain before upgrading: what runs the simulation, what displays it, how you control the car, and which outputs use its data? Check requirements and connections at each point, then configure and test the system as a whole. That gives every addition a clear role in the driving experience.
Choosing a Set-up: Screens, VR and Motion Compared by Use Case
The right display and feedback approach depends on how you race and what your room allows. Screens keep the cockpit and surroundings in view; VR places a virtual scene around you. A static rig delivers visual, audio and control feedback without platform movement, while motion adds selected physical cues. Neither route is universally better. Choose the combination that supports your priorities and feels comfortable to use.
| Option | Benefits | Trade-offs | May suit you if… |
|---|---|---|---|
| Single screen | Simple viewing arrangement and straightforward placement. | The visible scene is limited by the screen’s size and position. | You want a direct view of the cockpit and have limited space. |
| Multiple screens | Can extend the view across more of the surrounding track. | Needs room for additional displays and careful alignment. | You value a wider screen-based view and can dedicate space to it. |
| VR headset | Surrounds your view with the simulated scene and gives a strong sense of depth. | Comfort, headset requirements and your preference for wearing a headset all matter. | You want an enclosed visual experience and are comfortable racing in VR. |
| Static rig | Provides visual and control feedback without platform movement. | Physical cues come from the controls and seat rather than a moving platform. | You prefer a simpler physical arrangement or want to prioritise other layers. |
| Motion rig | Adds movement cues based on supported simulation data. | Requires room for platform movement and careful software and hardware configuration. | You want selected vehicle behaviour represented physically as well as visually. |
Is VR or a screen-based simulator better for your set-up?
Screens let you see the physical cockpit around the display, which can make it easier to stay aware of your room. A well-positioned screen or group of screens creates a view across the track, while VR places the image in a headset and can provide a more enclosed perspective. Let your preferred sightlines, available room and comfort during longer sessions guide the choice, rather than assuming one format suits every driver. For headset-specific considerations, see this Pimax VR motion simulator set-up guide.
When does motion add meaningful feedback?
Motion is most useful when it corresponds to selected events in the simulation, rather than simply adding activity. A 3DoF platform represents movement across three degrees of freedom; a 6 DOF platform can represent movement across six. Those labels describe the range of movement, not a guarantee of realism. The result depends on configuration and how well the cues complement the display and controls.
Before choosing a combination, check the requirements and compatibility of the headset, simulation software and motion system. Then consider practical fit: screens need suitable placement, VR needs a clear area for use, and a moving platform needs room to operate. An immersive racing simulator setup should fit both your driving priorities and your home. If motion is part of that plan, explore Race@Home motion platforms as one layer in a balanced rig.
How to Plan and Tune an Immersive Racing Simulator at Home
A successful home rig starts with a plan, not a pile of components. Decide what matters most to your driving, map the space, confirm connections and requirements, then build and test in stages. This helps you spot practical constraints early and gives every component a clear role in the finished set-up.
- Define your priorities. Decide whether your focus is competitive consistency, a wider visual field, VR or physical feedback. Choose the experience you want first, then use it to guide equipment decisions.
- Measure the space. Record the cockpit footprint and leave room to enter, exit and adjust the seat. If your rig includes motion, allow clearance around moving components, not just the platform’s resting position.
- Check compatibility. Compare the documented requirements of the computer, simulation software, display or headset, controls and motion hardware. Confirm supported connections and leave power points accessible.
- Assemble and test in stages. Position the seat and controls, route cables away from moving parts, and check ventilation around the computer. Test the core rig before adding or adjusting another feedback layer.
What should you measure and check before assembling?
Measure the rig and its usable clearance, including space for movement, seat adjustment and comfortable access. Plan where the monitor or headset will sit in relation to your driving position, and check that the controls are reachable when seated. Keep power connections accessible and route cables so they won’t snag or restrict motion. Use each component’s documentation to check its requirements before assembly.
How can you tune feedback without adding confusion?
Start with stable display and control settings. Check that your steering and pedals respond predictably before changing motion effects; otherwise, it’s harder to identify which adjustment caused a problem. Use a familiar circuit and change one setting at a time. Note whether each cue feels clearer, less distracting or unchanged.
Take breaks if a headset or moving rig causes discomfort. Motion sickness can affect some people, and reducing intensity or stopping a session may help you assess what feels comfortable. For more focused suggestions, see this guide to motion sickness in sim racing.
For a broader view of component choices and planning a motion-based rig, explore the professional motion rig set-up guide. A carefully planned immersive racing simulator setup should work within your room as well as suit your driving style. Explore Race@Home motion platforms as you consider how physical feedback could fit into your home rig.
Building Immersion with Race@Home LowSlider Motion Platforms
Once your visuals and controls work as a coherent system, motion can add another physical layer to the drive. A platform uses supported simulation data to create movement cues, translating aspects of the virtual car’s behaviour into sensations you can feel. It complements the display, cockpit and controls; it isn’t a substitute for tuning them well.
Race@Home hand-builds LowSlider motion platforms to order around its proprietary design. The range includes the LowSlider 6 DOF Twin-Traction-Loss Motion Platform and the LowSlider 3DoF motion platform. Their different movement configurations give you options to consider alongside your preferred experience and the rest of your rig. A platform is one part of an immersive set-up, not a stand-alone route to immersion.
How can a LowSlider platform fit into a considered home rig?
Plan the platform as part of the complete driving position: cockpit, seat, controls, display, computer and simulation software. Before deciding where it will sit, account for the rig’s footprint, access to the seat and space around moving components. The LowSlider design has an ultra-low profile and compact footprint, which can help when planning a home layout. You’ll still need to measure your room and allow suitable clearance.
Because the platform relies on simulation data to create motion cues, compatibility and configuration matter. Check the relevant requirements for your software and hardware, then consider how physical feedback will complement your existing controls and visuals. For more guidance on planning around a compact footprint, see the compact motion simulator guide.
What are the practical next steps for exploring motion?
Start with the cues you want to feel and the space you can dedicate to the rig. Then compare the two LowSlider platform options against those priorities, considering how each would fit into your cockpit and the experience you’re building. A deliberate choice makes it easier to integrate motion as a considered upgrade, rather than adding movement before the rest of the set-up is ready.
Practicalities are part of the design. LowSlider platforms are shipped worldwide in four pieces for customer assembly, which can be completed in under an hour. Plan a clear area for assembly, then account for clearance and cable routing when positioning the rig. Follow the product and software requirements when configuring the system.
For a considered immersive racing simulator setup, choose motion to suit your driving priorities, available space and wider hardware configuration. Explore Race@Home’s LowSlider motion platform options and decide which physical-feedback layer belongs in your rig.
Shape Your Next Upgrade Around the Drive
Your next step doesn’t have to be a full rebuild. Choose one part of your rig you’d like to improve, then consider how it will work with the components you already use. If motion is the missing layer, identify the cues you want to feel and the room you can dedicate to them. That gives your immersive racing simulator setup a clear direction, with upgrades guided by purpose rather than momentum.
Race@Home’s LowSlider platforms are hand-built to order, with an ultra-low-profile design and compact footprint for home-rig planning. They’re shipped in four pieces for customer assembly, which can be completed in under an hour. Consider how those practical details fit your space and plans, alongside the physical feedback you want from your simulator.
Explore Race@Home motion platforms to find a LowSlider option for your rig. Build with intention, test what you add, and let the driving experience lead the way.
Frequently Asked Questions
What is an immersive racing simulator set-up?
An immersive racing simulator set-up is a group of components arranged to make a virtual drive feel involving and responsive. For example, a screen aligned with your seated eye level and controls positioned to suit your driving posture can help you settle into the rig. The best combination depends on what you race, how much room you have and which sensory details matter most to you.
Do you need a motion platform for an immersive racing simulator?
No, a motion platform isn’t essential. A static rig can be a good choice if you want to focus on consistent control inputs and a clear view of the circuit. Before adding motion, refine your seating position, control response and display placement. If you later want physical cues, check that your simulation and hardware support the necessary integration, then introduce and tune motion as a separate step.
Is VR better than triple screens for sim racing?
Neither VR nor triple screens are the right choice for every driver. VR can suit you if you want the virtual cockpit to fill your view, whilst triple screens may appeal if you prefer to see your physical controls and room. Consider how long you typically race, where the rig will sit and whether your computer can support your preferred display. Assess comfort and visibility before settling on a format.
Can you combine VR with a motion simulator?
Yes, VR and motion can be combined if the specific headset, simulation software and motion hardware support the necessary integration. Check each component’s requirements, including the computer’s capability, before building around the combination. Once connected, begin with restrained motion settings and short test sessions. If the movement feels out of step with the virtual view, adjust one setting at a time rather than changing several at once.
How much space does an immersive racing simulator need?
There’s no single footprint for an immersive racing simulator setup. A compact cockpit with one display needs a different layout from a rig with multiple screens or a moving platform. Measure the area the equipment occupies, then leave usable space to get in and out, adjust your seat and reach power connections. Check where cables will run so they don’t obstruct access or interfere with moving parts.
What should you upgrade first for a more immersive sim racing set-up?
Upgrade the part that currently interrupts your driving most. If you struggle to judge corners, review display position and visibility; if your braking feels inconsistent, assess pedal placement and how securely the cockpit holds your position. Change one thing, then repeat a familiar session so you can judge its effect. This makes it easier to distinguish a useful improvement from settings or hardware that simply add complexity.
How long does it take to assemble a Race@Home LowSlider simulator?
Customer assembly of a Race@Home LowSlider platform can be completed in under an hour. Set aside a clear working area and follow the product instructions. This is the platform assembly time, not a promise that the full simulator will be configured in the same period. Integrating it with your cockpit, controls and simulation software is a separate task, and the time needed depends on your wider rig and configuration.


